



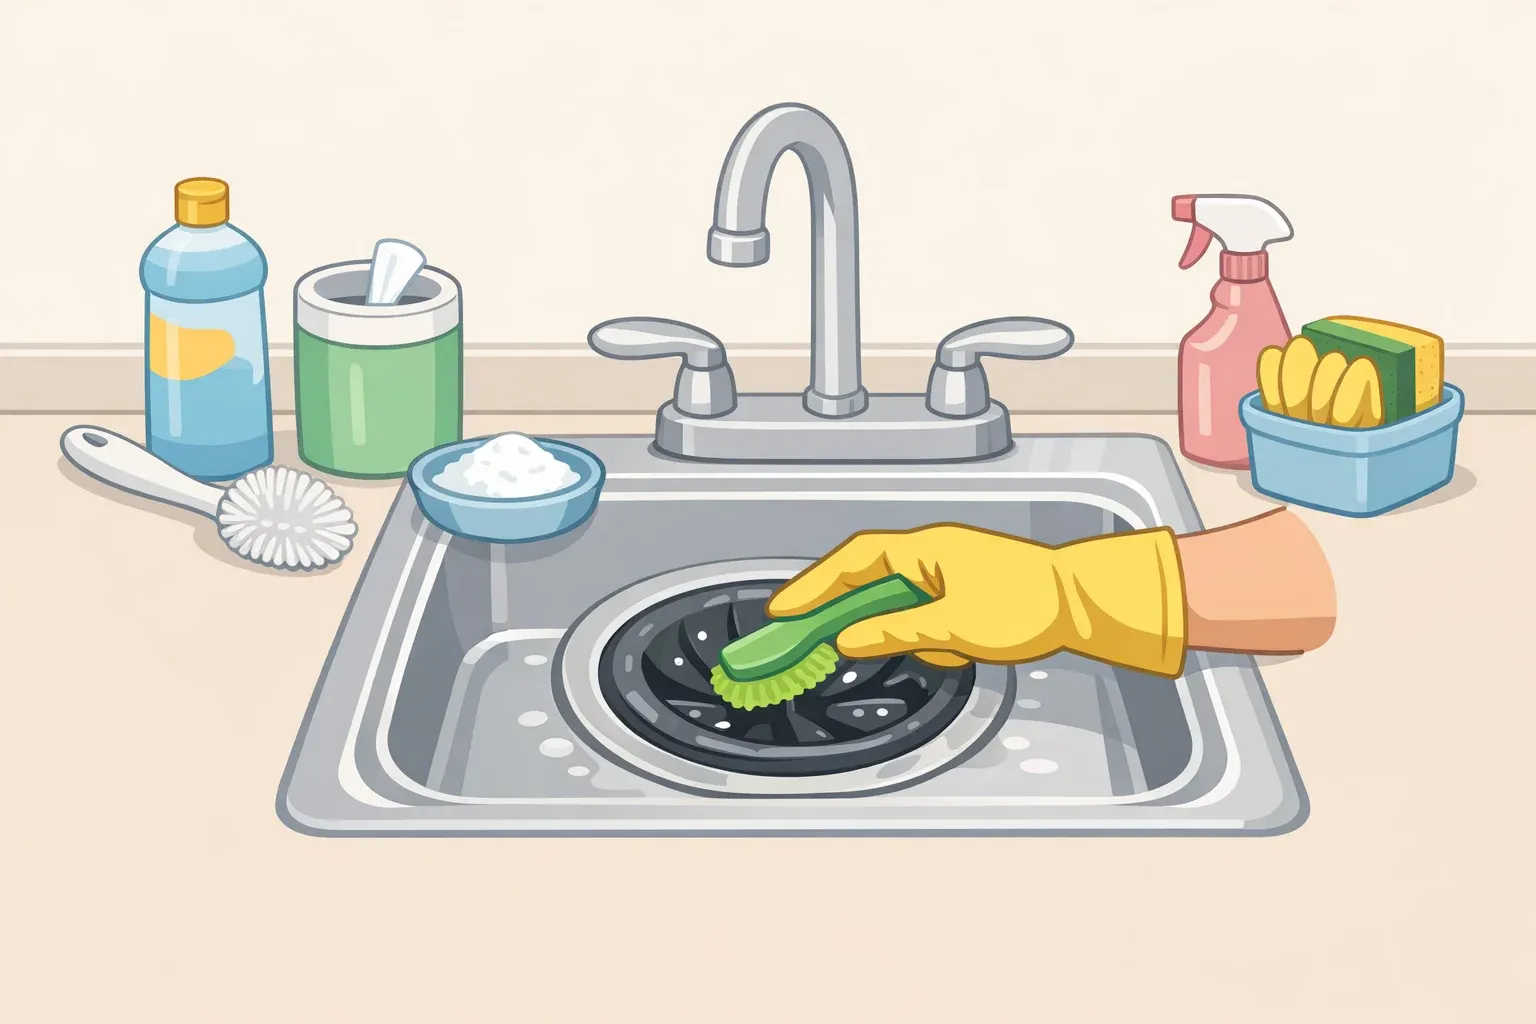
A garbage disposal rinses every time you use it, but that doesn't mean it's actually clean. Odor-causing grit and grime cling to spots plain water never reaches, especially the grinding surfaces, the inner chamber wall, and the underside of the rubber splash guard, according to Wirecutter and Benjamin Franklin Plumbing. Learning how to clean a garbage disposal properly means targeting those hidden spots, not just running the tap longer.
Benjamin Franklin Plumbing's Wichita-based guidance puts a well-maintained disposal's lifespan at 10 to 15 years, a range ServiceMag also attributes to quality units like InSinkErator's Evolution line or Moen's GX and EX series under normal use and upkeep. Budget models tend to fall short of that, closer to 5 to 8 years.
Skip maintenance altogether, and the more likely outcome is odors, clogs, motor failure, and an unplanned call to a plumber. This guide covers the correct low-risk method with the power state called out at every stage, a realistic cleaning schedule instead of a one-size-fits-all rule, and a way to tell an ordinary odor apart from a drain or mechanical problem that no amount of cleaning will fix.
What you'll need before you start
Gather a few basic items before you touch the sink. Wirecutter notes that dish soap, water, and ice cubes cover a basic clean, and a stiff brush, such as an old toothbrush, handles the parts a sponge can't reach.
Dish soap
Cold water
Ice cubes
A stiff brush or old toothbrush
Tongs or pliers for retrieving anything visible in the chamber
Use cold water for every step that runs the disposal. The Waste King operating manual specifically advises against running hot water while the unit is operating, and Benjamin Franklin Plumbing's independent guidance agrees that cold water is standard for normal use.
This method doesn't require disassembling anything, and the safety boundary is simple: never put a hand inside the disposal, even when it's switched off, no matter how simple the job looks. Inspect and clean from above using a flashlight, tongs, pliers, or a brush instead.
Skip chemical drain cleaners entirely. The Waste King manual warns that lye and chemical drain cleaners cause serious corrosion of metal parts inside the disposer. Bleach is off the list too: Benjamin Franklin Plumbing notes it degrades rubber components and can release harmful fumes when it mixes with food residue.
Know your disposal type before you start
Continuous-feed units usually run from a wall switch: flip it on, and the disposal keeps running as long as the switch stays on and water flows. Batch-feed units use a stopper instead, at least on models like Waste King's, where you drop the stopper into the drain opening and push down until it locks into the switch plunger inside the neck of the unit; lifting the stopper back out turns it off, according to the Waste King operating manual. Exact controls vary by model, so check your owner's manual first if you're not sure which type you have.
The steps below describe a wall switch, which fits continuous-feed units; if yours is batch-feed, swap that step for placing and removing the stopper. The safety steps and splash-guard cleaning are broadly similar across both types, but activation and shutdown controls vary, so follow your model's manual for batch-feed operation.
Isolating power matters most. For hands-on work, unplug a cord-connected unit from the outlet under the sink, or switch off the correct breaker for a hardwired unit. If you can't identify the correct breaker or safely isolate power, stop and call a professional rather than relying on the wall switch alone. If there's standing water sitting in the sink, work around it carefully, and don't add anything to it until power is confirmed off.
How to clean a garbage disposal safely (step-by-step)
The method has two clearly separated power phases. Don't blend them, and don't restore power until the first phase is fully done.
Phase 1: power off for inspection and splash-guard scrub
Confirm the disposal has no power, using the unplug or breaker method above, before your hands go anywhere near the chamber or splash guard.
Use a flashlight to look into the chamber from above, and remove any visible debris with tongs or pliers, never your hand, per Smart Plumbing USA's safety guidance.
Fold back the rubber splash guard flaps and scrub the underside with a stiff brush and dish soap, then rinse. Both Benjamin Franklin Plumbing and Adaven Plumbing identify the underside of the splash guard as a commonly overlooked place where residue and odor can remain. When you're done, the underside of each flap should look and feel clean, with no visible film or debris left behind.
Phase 2: power restored for soap flush and ice
With the splash guard clean and every tool clear of the chamber, plug the drain and fill the sink with a few inches of cold water, then add a squirt of dish soap. This part is safe to do before power is back on. Once the sink is filled, restore power, then unplug the drain and flip the switch to let the soapy water flush through. On a batch-feed model, drop the stopper in once power is restored to start the flush, and lift it out when you're done.
Keep cold water running for 15 to 20 seconds after the grinding sound stops. This timing matches guidance from the Waste King manual and Benjamin Franklin Plumbing, though it's worth checking your own manual since exact recommendations can vary by model; the goal either way is flushing residue and keeping grease from coating the chamber.
Optional: run a handful of ice cubes through the disposal with cold water. Ice doesn't sharpen disposal blades, because there's nothing to sharpen; the unit grinds by impact, not slicing, so ice mainly scours the chamber rather than cutting anything. It can scrape away loose debris, but Adaven Plumbing notes it won't remove grease or bacteria from hard-to-reach spots on its own.
Check your work. The sink should drain freely, the water should run clear, and there shouldn't be any lingering food smell when you run the tap afterward. That's a reasonable sign the chamber itself is clean, though it doesn't rule out a problem farther down the drain line. If odor remains after this full routine, stop cleaning and move to the decision guide below to figure out what's actually going on.
How often should you clean a garbage disposal?
Use three checkpoints: every use, monthly, and quarterly. No supplied source pins these to one universal interval, but layering the three habits covers most kitchens well.
Every use: run cold water before, during, and for 15 to 20 seconds after grinding stops, and feed waste in small amounts instead of dumping a full load at once. Both the Waste King manual and Benjamin Franklin Plumbing tie this habit to fewer jams and less residue buildup.
Monthly, or whenever odor returns: repeat the soap flush from the steps above, and work the splash-guard scrub back in if it's been a few weeks since the last one. Benjamin Franklin Plumbing's monthly recommendation rotates between a few options: the soap-and-water flush, a baking soda and vinegar rinse, or frozen vinegar ice cubes.
Optional odor treatment: cleaning a garbage disposal with baking soda and vinegar means pouring half a cup of baking soda into the disposal, followed by half a cup of white vinegar, letting it fizz for a few minutes, then flushing with cold water while the disposal runs. Treat it as optional rather than required. Its odor-neutralizing claim comes from a single plumbing-company source and hasn't been independently verified here.
A note on citrus: some plumbing sources recommend grinding a lemon or lime peel to deodorize a garbage disposal, but that advice isn't universal. Adaven Plumbing warns that citrus peels can stick to the grinding surfaces and rot instead of freshening anything, leaving a sticky residue that traps more debris later. Given that disagreement, skip citrus as a routine step; it wouldn't replace the soap flush anyway.
Quarterly: scrub the splash guard underside again, and check beneath the sink for leaks at the top, side, and bottom of the unit.
Even during a slow cooking stretch, run the disposal briefly with cold water every few days. Benjamin Franklin Plumbing warns that a unit left idle for weeks can develop rust, corrosion, or seized parts, a bigger problem than a little odor.
Climate changes the timeline too. In Las Vegas, where summer heat and humidity are common, warm, moist conditions can encourage odor-causing buildup and make smells return faster. That's an observation from one regional plumbing source, not a universal rule, but a kitchen that runs hot and humid is a reasonable candidate for cleaning more often.
What not to put in the disposal
Prevention beats cleanup. A handful of waste categories cause most of the clogs, jams, and odors Benjamin Franklin Plumbing sees in the kitchens it services.
Grease, fats, and oils. Hot grease coats the chamber and pipe walls as it cools, narrowing the drain and giving other debris something to stick to. Pour it into an empty can or jar, let it solidify, and toss it in the trash instead.
Fibrous produce. Celery, asparagus, artichokes, corn husks, and onion skins wrap around the impeller and can jam the motor or burn it out if the jam is bad enough. Compost these or bag them for the trash rather than grinding them.
Starchy foods in bulk. Rice, pasta, and potato peels absorb water and can expand into a paste that clogs the disposal and the pipe beyond it. Small amounts are fine; scrape larger quantities into the trash or compost instead.
Pits, bones, and shells. Peach pits, avocado pits, and chicken bones can damage the impeller lug or grind ring, or pass through and lodge in the drain pipe. A small fish bone is unlikely to cause trouble, but anything larger belongs in the trash.
Anything that isn't food. Bottle caps, twist ties, plastic wrappers, and stray utensils are common causes of the foreign-object jams covered below. Keep a drain strainer in the sink when the disposal isn't in active use to catch them before they fall in.
When it's not a cleaning problem: a quick decision guide
Use this after a proper cleaning hasn't solved the issue. Some symptoms have nothing to do with a dirty chamber.
Lingering odor, but the sink drains normally. The smell may be coming from the P-trap losing its water seal, or from residue farther down the drain line rather than the disposal chamber itself. If cleaning hasn't fixed it and drainage is normal, that likely points to the drain system rather than a maintenance failure, though only inspection can confirm which.
Disposal spins normally, but the sink backs up, gurgles, or water sits in the other basin. Smart Plumbing USA points to a P-trap, discharge pipe, or branch drain restriction rather than anything inside the disposal itself. Running the disposal again won't clear a downstream clog.
Disposal hums but doesn't spin. Stop immediately and don't keep flipping the switch. Repeated attempts can overheat the motor. Cut power, then check for a visible object with a flashlight and remove it with tongs, never your hand. If your model has a bottom hex socket, a 1/4-inch Allen wrench can often free the flywheel by turning it back and forth. If that doesn't clear it, or your unit lacks that socket, call a plumber rather than improvising further.
No sound at all. With power off, inspect the chamber for visible debris and clear it with tongs, pliers, or the model's hex wrench, the same as with a humming disposal. If the unit was running hot before it went quiet, let it cool for 5 to 10 minutes. The reset button shouldn't substitute for clearing a jam, so once debris is cleared, press the small red or black reset button on the unit's underside until it clicks, then restore power. If the disposal is cord-connected, also check whether a nearby GFCI outlet has tripped, since a tripped GFCI cuts power and looks identical to a disposal failure, per ServiceMag. Test briefly with cold water running. Stop if the reset button pops back out, the breaker trips, or the unit hums instead of spinning; that points to a jam that hasn't fully cleared, a failing motor, or an electrical problem worth a plumber's look.
Leak from the unit. Where it leaks changes what it means; a leak near the top, at the sink flange, usually points to a failed putty or gasket seal. A leak at the side, where a dishwasher hose connects, often traces to a loose clamp or worn gasket; tightening the clamp is worth trying first. A leak from the bottom of the unit itself means internal seal failure, and that typically calls for replacement rather than repair.
Burning smell, sparks, repeated breaker trips, or a unit that feels hot. Stop use and call a professional. These are not normal jam symptoms to keep testing.
Finishing up
A clean disposal comes down to cold water with every use, a splash-guard scrub worked into the monthly flush, and a quarterly leak check under the sink. Skip the shortcuts, too: Wirecutter warns that a whole lemon or a large amount of powdered dishwasher detergent could cause a backup, so leave both out of the routine.
If you've run the full cleaning routine above and the smell, humming, or slow drain hasn't improved, move to the decision guide rather than reaching for another home remedy. Persistent symptoms after a proper clean usually point to the drain line or the motor, not a dirty chamber, and that's a plumber's call rather than another round of garbage disposal cleaning tips.














Comments
Be the first, drop a comment!