



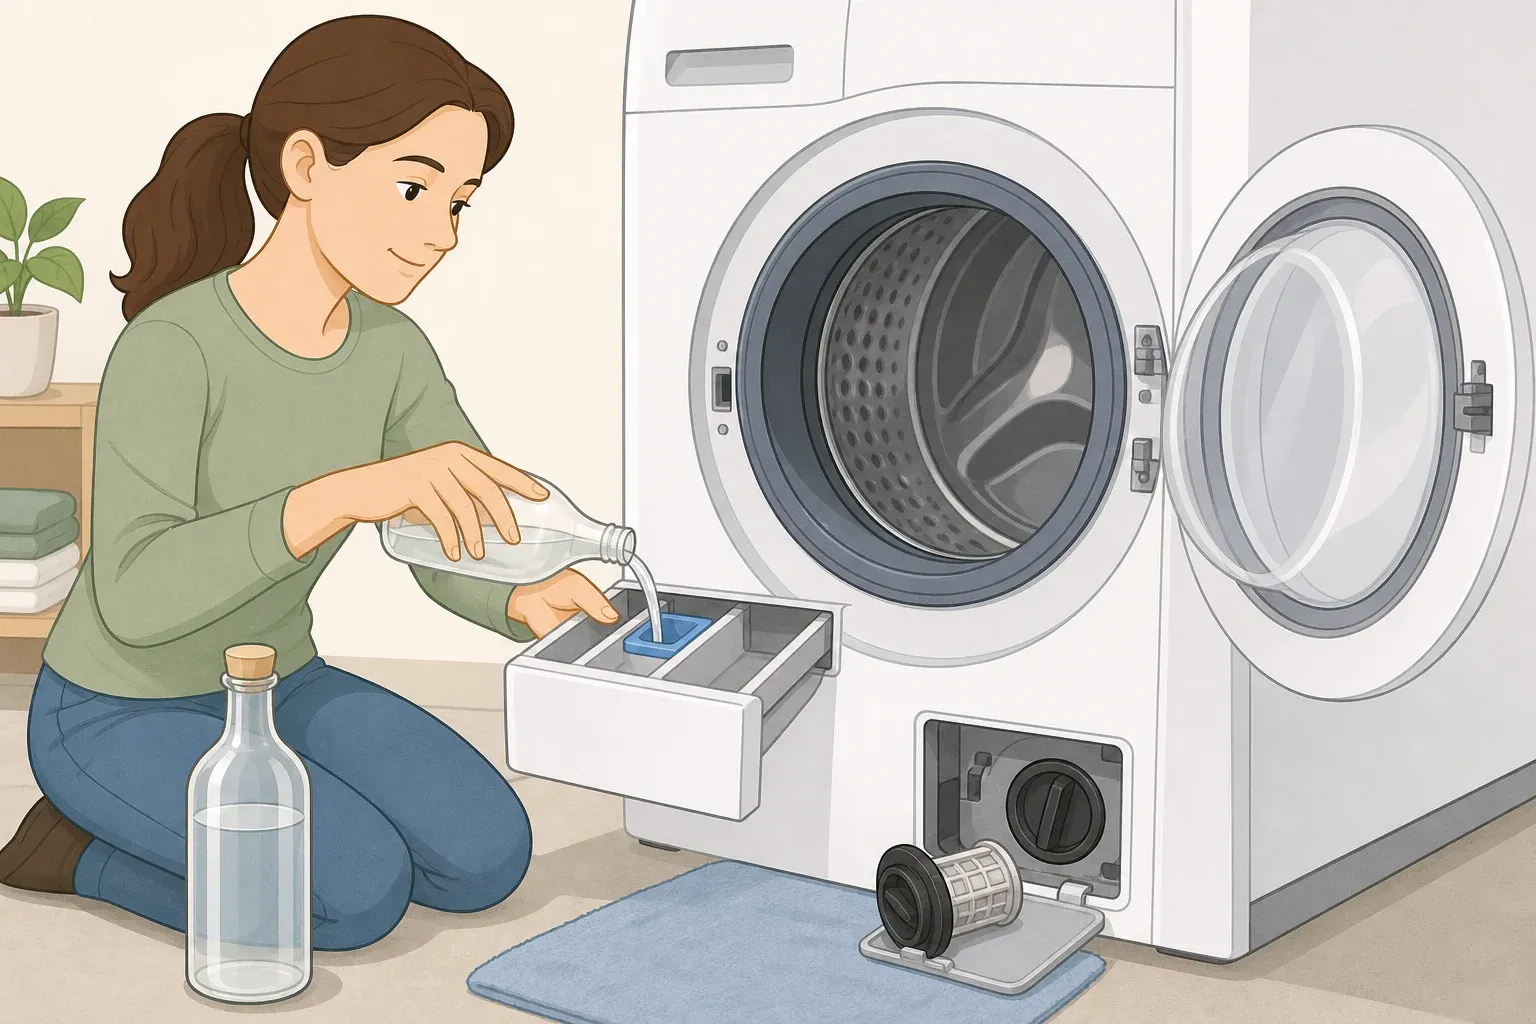
Vinegar has a narrow but genuinely useful job in washing machine care. It works well on the detergent drawer and the exterior housing, but pouring it straight into the drum as a routine habit is where it starts causing problems. That's the short answer to how to clean a washing machine with vinegar, and it's worth saying up front because a lot of advice floating around treats vinegar as a cure-all for the entire machine.
The reason comes down to what's tucked inside the drum. Straight white vinegar is harsher on rubber gaskets with frequent use, which is why they recommend saving it for occasional cleanings rather than a regular cycle. That doesn't make vinegar off-limits everywhere in the machine; it just means the drum is the one spot where the manufacturer's own instructions should take over. This guide covers where vinegar actually helps, how to handle the drum the way your specific model's manual recommends, and a simple maintenance routine that keeps odor from building up in the first place.
None of this requires special tools, and the vinegar-safe tasks run about 20 minutes of hands-on time. The drum cycle, once you get to it, runs on its own, and how long it takes depends on your washer.
Is vinegar safe for washing machines?
Vinegar is safe for some parts of a washing machine and riskier for one in particular: the drum. The drum houses most of the machine's rubber components, including the door gasket, and repeated exposure to an acid like vinegar wears those parts down over years of use. Straight vinegar can be an occasional option, maybe three or four times a year, with gentler acids reserved for anything more frequent.
Two rules apply no matter which part of the machine you're working on. Never mix vinegar with bleach, in the washer or in a bucket. The combination releases chlorine gas, which is toxic in an enclosed space, full stop. Also, don't layer cleaning products in the same cycle or bucket. If you want to try a different cleaner after using vinegar, run a plain rinse cycle first so nothing lingers, then follow your manual's directions for the next product.
Before adding vinegar to the drum at all, pull out your washer's use-and-care manual. Manuals vary by brand and model, and the manual, not general advice found online, decides what your specific machine can tolerate.
What you'll need
Distilled white vinegar
Warm water
A basin large enough to submerge the detergent drawer
A soft-bristled brush (an old toothbrush works fine)
Two microfiber or soft cloths
Your washer's use-and-care manual
Check a few things about your specific machine before you start. If it's a front-loader, it may have an accessible drain pump filter behind a small panel near the bottom; top-loaders usually don't, and that filter gets covered in the maintenance section below. Most dispenser drawers slide out with a firm pull or a small release tab, but some older or budget models have fixed dispensers that only accept wiping, not soaking. Finally, flip through your manual's index for "clean washer" or "tub clean" so you already know which cycle and cleaner your model calls for once you reach the drum step.
How to clean a washing machine detergent drawer with vinegar
This is the vinegar method that holds up under actual testing, not just a tip passed around in cleaning forums.
Remove the drawer. Most slide out with a firm pull or a small release tab. If yours doesn't budge with gentle pressure, stop and check the manual instead of forcing it.
Mix equal parts white vinegar and warm water in a basin big enough to submerge the drawer.
Let it soak for around 20 minutes to loosen detergent film, the same soak time the Ideal Home test used.
Scrub the compartments and corners with the soft brush to knock loose whatever's left.
Rinse thoroughly with fresh water and dry completely before sliding the drawer back in.
Success looks like a drawer with no caked detergent film and no musty smell once it's dry. If you still catch an odor after drying, the film probably didn't fully soak loose; give it a second round rather than scrubbing harder.
A monthly soak is enough to keep residue from building back up for most households.
Clean the exterior and door seal
Wipe the housing with a cloth dampened in the same vinegar-water solution, then dry it immediately with a soft cloth to avoid streaking. Do this as soon as you notice dirt or buildup rather than waiting for a set cleaning day, since residue is easier to wipe off before it sets.
For the rubber door gasket, stick with a damp cloth instead of a vinegar soak. Dampen a cloth with plain warm water, wipe the full gasket including the folds where moisture collects, then dry it with a separate cloth. Checking the seal often and wiping it down between deep cleans keeps residue from building up in those folds, which is exactly where mold tends to start.
Light residue is fine to handle this way. If you see mold that keeps coming back, gasket material that looks cracked, torn, or discolored, or odor that persists after wiping, stop with surface cleaning and move to the troubleshooting guidance at the end of this article instead of scrubbing harder.
Cleaning the drum: follow your washer's manual
Appliance manufacturers don't all agree on what their machines can handle, so the steps below follow one manufacturer's published process as a clear example, not a universal standard. Your own manual decides cleaner type, dosage, cycle name, and whether a rinse is needed afterward.
Before starting, find two things in your manual: which cleaner your model approves, commonly a washer-cleaning tablet or, on some models, liquid chlorine bleach, and which cycle is built for this job.
Empty the drum completely.
Add the approved cleaner to the bottom of the tub. Whirlpool's documentation on the Clean Washer cycle pairs this step with either affresh-style tablets or liquid chlorine bleach, depending on the model, and never alongside vinegar.
Run the cycle your manual names for cleaning. On Whirlpool machines, this is often labeled the Clean Washer cycle, which uses a higher water volume to clean the interior. Other brands may name it differently or skip a dedicated cycle entirely; in that case, pick a normal, hot-water cycle paired with your approved cleaner.
Consider running a rinse cycle afterward to clear out leftover cleaner, especially if you used bleach. Check your manual to see whether it's a required step for your model.
Leave the door open once finished so the tub can air-dry fully.
Whirlpool's product-support documentation recommends running this cycle monthly to maintain freshness and keep odors from developing. Treat that monthly schedule as guidance built around Whirlpool's own machines rather than a fixed rule for every brand.
Set your expectations accordingly: the goal here is less odor and residue, not a drum that looks dramatically different. When one Ideal Home writer poured vinegar directly into the drum and ran a hot cycle, the wash came out smelling and looking somewhat fresher, but the writer admitted it fell short of a true deep clean. If odor persists after you've run the proper cycle, check the accessible filters covered below before reaching for a second chemical treatment in the same week.
A few cleaning guides recommend citric acid as a descaling option for hard-water buildup. The amount is in the range of 100 to 200 grams per cycle, depending on machine size. That's not a method confirmed in the manufacturer instructions referenced for this guide, so if you want to try it, check your own manual first rather than guessing at a dose.
A simple maintenance schedule
After every load, leave the door open so the drum can air out, and pull clean laundry out promptly instead of letting it sit in a damp drum. Both habits cut down on the moisture that feeds mold and odor.
Check the door seal often and wipe it down periodically, focusing on the folds where moisture collects.
About once a month, run the drum cleaning cycle described above and soak the detergent drawer in the vinegar-water solution instead of just wiping it, the same monthly cadence Whirlpool's product support page lays out for the Clean Washer cycle.
Check the lint filter periodically and clear it if it looks full. Its location varies by model, but a clogged filter will affect performance. On front-loaders with an accessible drain pump filter, clean it periodically according to your owner's manual.
As an ongoing habit, use the detergent maker's recommended amount. Non-HE detergent in an HE machine can leave a film residue that contributes directly to odor, according to Whirlpool's product-support documentation.
When the routine isn't enough
If odor or mold comes back soon after a proper drum cycle and seal wipe-down, the source may be in the drain hose, pump, or filter rather than something a surface cleaner can reach. Mold reappearing within 48 to 72 hours of cleaning is a sign the problem has moved past the gasket into the drain hose or pump body. Treat quick recurrence as a reason to check those accessible parts and consider service, not as a precise diagnosis on its own.
Don't respond to a recurring problem by combining chemicals or escalating to something stronger. Stick with one approved method at a time, give it a fair test over a cycle or two, and call a service technician if the problem doesn't clear up.
Consider calling a professional if mold keeps returning within days of cleaning, if drainage stays slow after you've checked and cleared the filter, or if the machine sat unused for six months or more following a flood or renovation. That scenario typically needs drain sanitation beyond a routine wipe-down.
Success looks like a drawer free of film, a seal and exterior free of residue, and a washer that smells neutral after a load, not vinegary and not musty. A drum that isn't visibly gleaming after a cleaning cycle is normal and not a sign that anything went wrong.
The drawer-and-exterior vinegar routine is low-risk enough to keep up indefinitely. The drum is where judgment matters most. Let your machine's manual make that call rather than a generic rule found online.


















Comments
Be the first, drop a comment!