



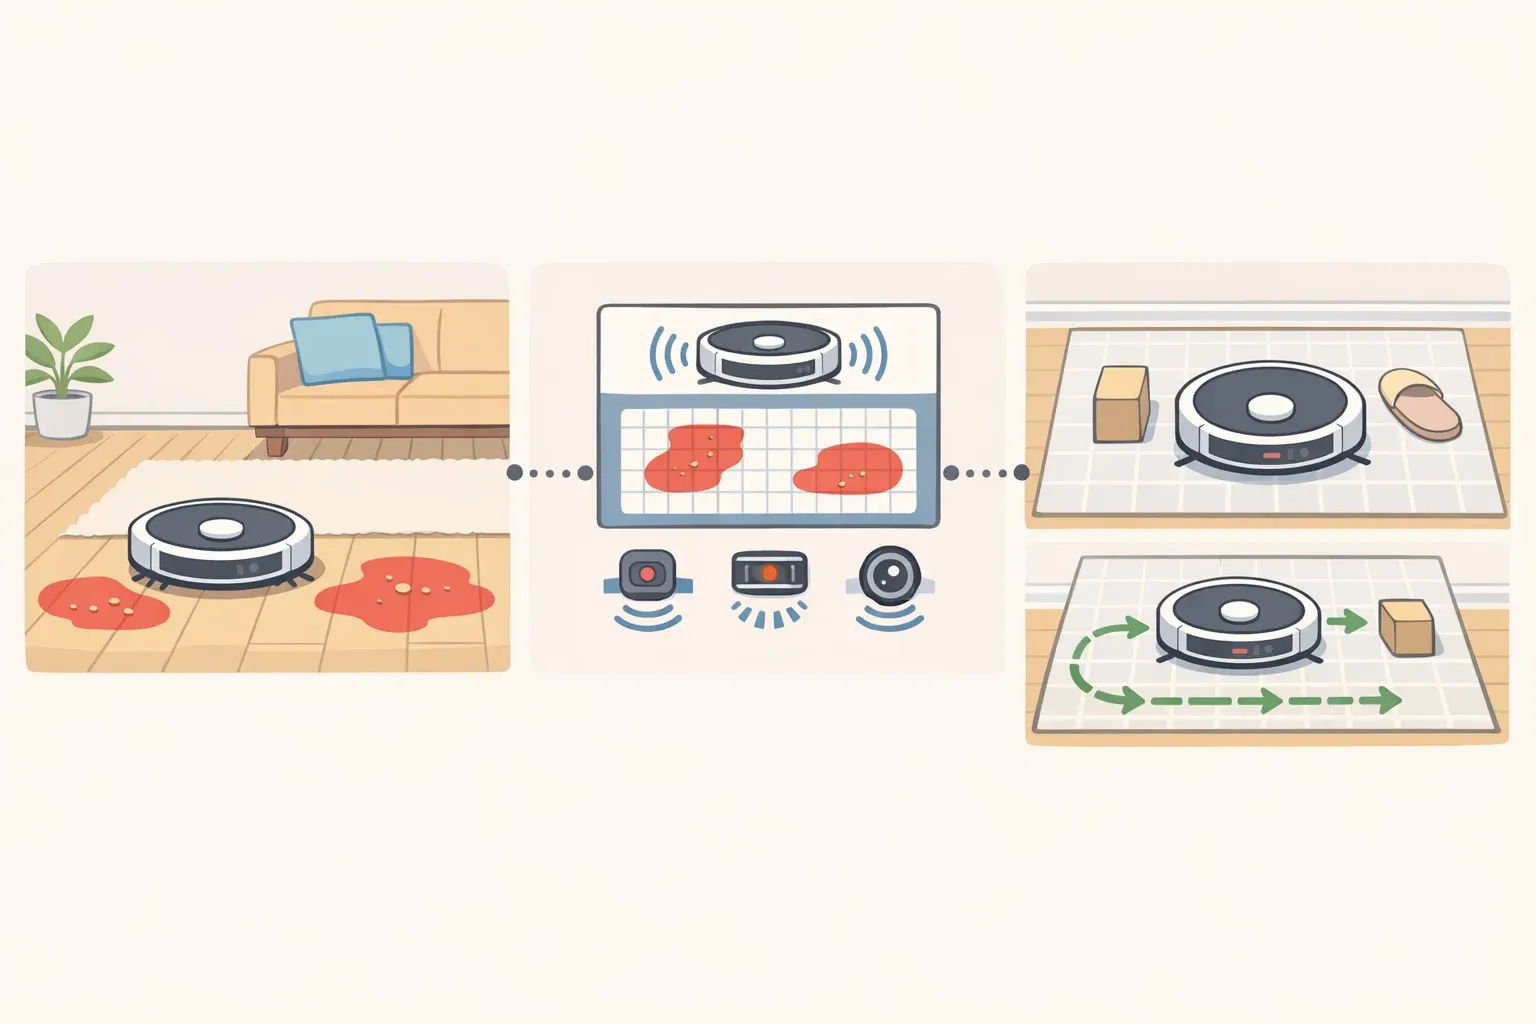
A robot vacuum that keeps missing the same spots is telling you something specific. It's failing at one of four common points in its cleaning process: it can't see the area, it can't physically reach it, it can't pick up debris once it gets there, or it can't finish the job before quitting. Figuring out which one applies to your robot vacuum missing spots problem is faster than wiping down every sensor and hoping something sticks.
Manufacturers are direct about the first cause. Roborock's manual for the Q5 Pro+ states plainly that when wall or cliff sensors get dirty, "the robot begins to miss certain spots," and tells owners to wipe them with a soft, dry cloth.
Pudu's robot vacuum guide calls sensors "the robot's eyes" and warns that once dust obscures them, "the robot will clean blindly." This guide walks through a four-part diagnostic: can't see, can't reach, can't pick up, can't finish, with a physical check and a test run for each, plus how to tell when a missed spot is a maintenance problem versus a hardware limit worth accepting.
Why is my robot vacuum missing spots? Check the map first
Before running every maintenance task on this list, open the companion app and match what the coverage map and job history are actually showing you to one of the four sections below.
App map shows no path into the area, or the route looks erratic or skips a room → Section 1 (Can't See)
App map shows the robot never entered the space at all, even though the path looks clean elsewhere → Section 2 (Can't Reach)
App map shows the robot drove over the area, but visible dirt or debris remains → Section 3 (Can't Pick Up)
Job history shows something like "paused," "ended early," or an incomplete coverage map → Section 4 (Can't Finish)
These categories overlap sometimes. A robot with a badly obscured sensor can also end a job early. Start with the symptom that matches most closely, then work through the others if the problem doesn't clear up after one test run.
What you'll need before you start
A soft, dry cloth for sensors, the camera window, and charging contacts
Your robot's companion app, to check the cleaning map, job history, and error alerts
Enough uninterrupted time to run through the checks below and do one test cleaning run afterward
Your specific model's manual, since maintenance rules vary by brand. iRobot says never wash its filter, while Roborock's Qrevo filter is washable but needs 24 hours to dry before going back in.
Power off the robot and unplug the dock before removing brushes, clearing an evacuation path, or servicing the charging station. Shutdown procedures differ by model, so check your own manual first. iRobot's guidance for the Roomba j8+, written for long-term storage, describes holding the clean button for a few seconds with one wheel lifted off the ground; other brands and models use a different combination entirely. This is a beginner-friendly job overall. No tools required beyond a cloth, and occasionally a coin or small screwdriver to remove a brush.
Can't see: clean sensors to fix robot vacuum navigation problems
This covers a robot whose route looks confused, that avoids an area entirely on the map, or that repeatedly bumps and reroutes near the same spot.
Check your manual for which sensors your model actually has, then wipe the wall and cliff sensors, camera window, and charging contacts it lists using a soft, dry cloth. Run one cleaning job covering just the affected room afterward, and compare the new coverage map to the one that showed the problem. If dust was the cause, the robot should now reach the area it skipped before.
If your model navigates by camera (vSLAM) rather than LiDAR, turn on the room lights and run the test again. Camera-based robots rely on visual landmarks to place themselves in a room, and they can struggle in dim or low-contrast spaces where LiDAR robots have no trouble.
If a room with a large floor mirror keeps getting skipped or mapped strangely, that's worth testing directly. Floor mirrors can distort the reflected light beams LiDAR relies on, which creates real mapping errors in some homes. Cover or temporarily move the mirror, run one test cleaning, and compare the resulting map before concluding that's actually the cause.
Once sensors check out clean, put the wipe-down on a repeating schedule instead of treating it as a one-time fix. iRobot recommends cleaning sensors, the camera window, and dock contacts once a month. Dust reaccumulates constantly, so a single cleaning that solves the problem this week won't necessarily hold up next month.
Can't reach: check furniture, curtains, and thresholds
This covers a map showing the robot never entered a space at all, even though its path elsewhere looks normal.
Start by comparing your robot's height, listed in its spec sheet, against the furniture clearance in that room. LiDAR robots sit taller because of a raised sensor puck, and can be blocked from spaces a lower-profile vSLAM robot would enter without issue.
If the height clears but the robot still won't go in, look for soft obstructions that LiDAR reads as solid walls. A fabric bed valance or floor-length curtain can make a LiDAR-equipped robot treat the space beneath as off-limits and skip it entirely, rather than pushing through the way a person would.
Tie the fabric back for one test run and see if the robot enters. If it does, that confirms the cause, and you can either keep the fabric tied back permanently or set a virtual boundary in the app so the robot stops repeatedly attempting a route it can't take.
If there's no soft obstruction and the space still gets skipped, measure the doorway width, threshold height, and any floor gap against your model's published specs rather than guessing. Clearance tolerances vary a lot between models.
As one example of the type of limit that matters, a commercial cleaning robot's manual lists a maximum obstacle height and gap width it can cross before getting stuck, though those exact figures apply to that machine, not necessarily a household model. Check your own owner's manual for the actual numbers.
If the barrier turns out to be structural, a low sofa base or a permanent raised threshold, stop adjusting settings. Manual spot-cleaning of that area is the realistic answer.
Can't pick up: clean the bin, filter, brushes, and caster
This covers a map confirming the robot drove over the area, but visible debris remains right after the pass.
Empty the bin, then clean the filter and brushes. iRobot's manual states directly that reduced pickup means it's time to do exactly this. Run the robot over the same spot again right afterward to see whether pickup improves.
Follow your model's actual filter rule instead of assuming brands match. iRobot's filter should be cleaned weekly, twice weekly with pets, never washed, and replaced every two months. Roborock's Qrevo filter is washable but needs at least 24 hours to fully dry before it goes back in.
If the test pass still leaves debris, clean the brushes and front caster wheel next. iRobot recommends monthly brush cleaning, twice monthly with pets, and warns that a wheel clogged with hair and debris can damage flooring. Power the robot off first, per the safety note above.
If pickup looks fine right after a run but debris reappears over the following days, check whether that's an auto-empty issue rather than a pickup issue. If your robot has an auto-empty dock and the bin isn't emptying on schedule, check the dock's status light and evacuation path according to your manual.
One mistake to avoid: don't manually place the robot on the dock. Auto-emptying won't trigger if you set it there by hand instead of letting it dock itself.
Can't finish: check battery, dock placement, and scheduling
This covers a job history showing a run that paused, ended early, or produced an incomplete coverage map, statuses that look identical to missed spots from the outside. The exact wording varies by app and brand, so treat these as examples rather than universal labels.
Check the battery level before a scheduled clean. Roborock's Qrevo will only start a scheduled job above 15% battery, so a low charge at the scheduled time can mean the job never runs at all.
Review your app's scheduling and Do Not Disturb settings next. Roborock's Qrevo has a default DND window of 22:00 to 08:00. Check your own model's app to confirm whether DND affects scheduled cleaning, auto-emptying, or just alert sounds, since this varies by brand and shouldn't be assumed to block a run outright.
Also look for a timeout. iRobot models may end a cleaning job after 90 minutes of inactivity away from the dock, so a robot wedged against a chair leg could quit for that reason rather than finishing. If you spot a robot stuck against furniture mid-run, clear the obstruction and start a fresh test cleaning to see whether it completes.
Finally, check dock placement, since the correct clearance depends on your model. Roborock's Q5 Pro+ manual calls for a flat floor away from heat and water, with no narrow spaces or overhangs nearby, while the Qrevo manual specifies a hard, flat floor against a wall with roughly 0.9 m of height, 0.4 m of width, and 1.2 m of depth kept clear around the dock. iRobot separately requires the charging station or dirt disposal to sit at least 4 feet (1.2 m) from stairs to prevent falls.
Success looks like a job history entry marked complete with a full coverage map, not one that reads "ended" or "paused."
Finish line: what to do now
Work through these four checks in the order that matches your symptom: sensors and camera clean, physical path clear, bin, filter, and brushes maintained, battery and dock settings correct. Confirm each with a test run before assuming the robot itself is broken. Manufacturer maintenance schedules exist specifically to prevent this problem. iRobot's checklist covering filter, brushes, sensors, wheels, and camera is built to stop navigation and pickup performance from degrading over time.
If a robot vacuum leaves areas uncleaned after all four checks, and it only happens in one specific location, near a mirror, under a low sofa, in a dim corner, that likely reflects a navigation-technology limit rather than a maintenance gap. It's a known trade-off with both LiDAR and vSLAM systems.
If your app offers a map-reset or remapping feature, check your manual for how to use it, then delete and rebuild the map for that room once obstacles are cleared and sensors are clean. Not every model supports this, so confirm it's available before relying on it. For any zone the robot structurally can't reach, plan to vacuum it by hand rather than repeatedly re-running the same failed job.
If the robot shows a persistent error light, repeatedly fails to find its way back to the dock, or the auto-empty path stays clogged after you've cleared visible debris and checked the evacuation port, stop troubleshooting and treat it as a service issue. Contact the manufacturer directly, such as iRobot's Customer Care team, which is reachable Monday through Friday and on weekends with shorter hours.















Comments
Be the first, drop a comment!