



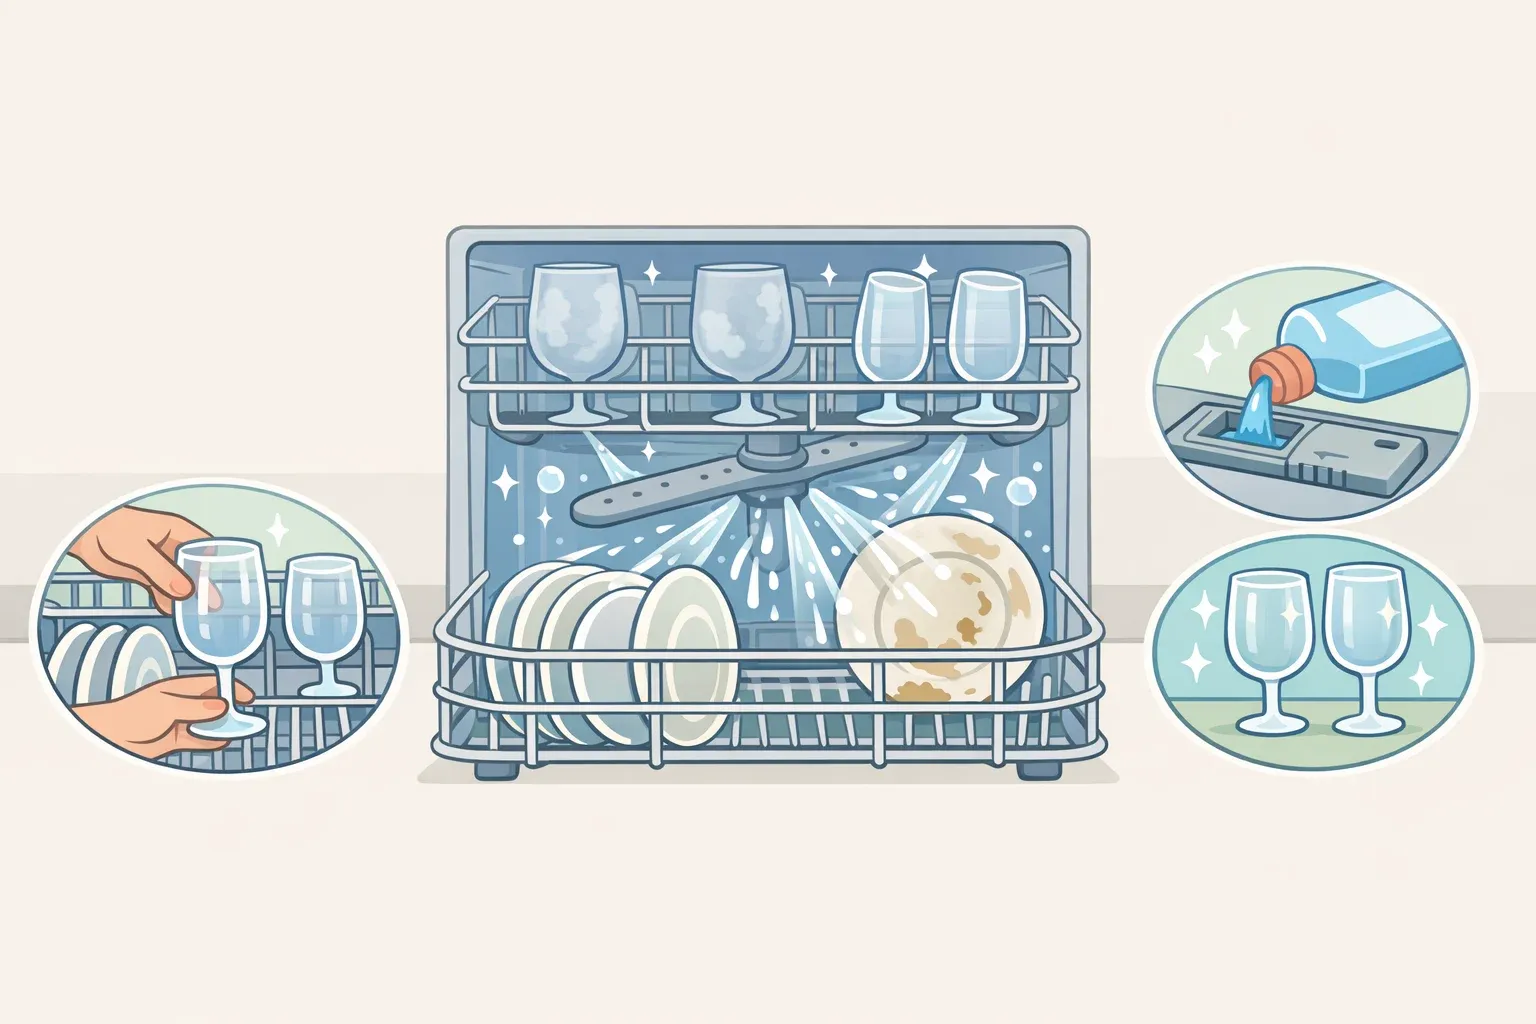
Dishes that come out spotted, filmy, or wet aren't a mystery. In most kitchens, the problem is one of four things: a dirty machine, poor loading technique, wrong products or settings, or hard water. This guide walks through each cause in order, with specific fixes for each one. Work through the stages sequentially. Most households will solve the problem in stages one through three. Those who don't will find out exactly why and what to do about it.
Start with triage. The symptom usually points directly to the cause:
What you're seeing: Food particles or grit on dishes
Most likely cause: Clogged filter or blocked spray arm
Where to start: Stage 1
What you're seeing: Detergent residue or cloudy film on everything
Most likely cause: Detergent misuse or overloading
Where to start: Stages 2–3
What you're seeing: White spots or chalky haze on glassware
Most likely cause: Hard water mineral deposits
Where to start: Stage 4
What you're seeing: Dishes clean but consistently wet
Most likely cause: Cycle settings or rinse aid
Where to start: Stage 3
Carolyn Forté, former executive director of Good Housekeeping's Home Care & Cleaning Lab, has said that dishwashers aren't self-cleaning: food scraps, grease, undissolved detergent, and water minerals build up on filters and interior walls over time and can eventually clog spray arms. A dirty machine can make dishes dirtier rather than cleaner.
Hard water adds a separate layer. When water high in calcium and magnesium heats up or evaporates inside a dishwasher, those minerals crystallize into scale. Because dishwashers operate at high temperatures, Culligan notes, scaling accumulates faster in them than in most other household appliances. That's why a machine that seems functional can still produce cloudy results cycle after cycle.
Stages one through three are free fixes that take minutes. Stage four requires diagnosis first, then a range of responses depending on what that diagnosis reveals.
Stage 1: How to clean a dishwasher for better performance
A common reason dishes don't come clean is that the dishwasher itself hasn't been cleaned. A dirty machine recirculates contaminated water, and no amount of premium detergent or careful loading fixes that. The routine below takes less than five minutes once it becomes a habit.
After every load:
Once the machine is empty, sweep out any food debris — pasta, beans, olive pits, small bones — that collected around the filter during the cycle. Thirty seconds of work prevents the compounding buildup that forces a deeper clean later.
Every one to two weeks:
Remove the filter (typically located below the bottom spray arm), rinse it under hot running water, and scrub gently with a soft toothbrush. If the removal process isn't obvious, the manufacturer's website will have model-specific instructions. Good Housekeeping recommends cleaning it once every week or two, depending on how often the machine runs.
Wipe down the door gasket and edges. Debris collects in the rubber seal and contributes to odors and poor door closure. While the machine is open, check the spray arm holes for visible blockages.
Monthly:
Run a dedicated dishwasher cleaner through an empty machine on a hot cycle. This clears detergent film and mineral buildup from the tub, spray arms, and pump, the areas a toothbrush can't reach. Hidden buildup doesn't just cause odors; over time, it shortens the life of the appliance.
One note on vinegar: a cup of white vinegar placed on the top rack during an empty hot cycle will dissolve light mineral buildup and neutralize odors. It's a reasonable occasional option. Never pour it directly into the rinse aid compartment. The acidity degrades seals and gaskets over time, and running a vinegar cycle weekly causes the same problem more slowly, per Culligan and IV Appliance Clinic. For monthly maintenance cleaning, a commercial dishwasher cleaner or citric acid is the safer choice.
Some models advertise self-cleaning filtration systems. That label refers to a specific component, not the whole machine, even though those models require the maintenance steps above.
Once the machine is confirmed clean, the loading technique is the next variable to rule out.
Proper dishwasher loading tips for cleaner dishes
Loading technique costs nothing, and the results show up in the next cycle. The principle is simple: water needs to reach every surface to clean it. The specific mistakes that prevent this are worth naming because they're common and non-obvious.
Leave space between every item. Overloading is the most common loading error. When dishes are packed together, water can't circulate, detergent can't reach all surfaces, and rinse aid can't do its job. One underpacked load cleans better than two overpacked ones, as Culligan explains.
Before closing the door, check that nothing is blocking the detergent dispenser door or either spray arm. A pan handle or tall item in the wrong position prevents the dispenser from opening at the right moment in the cycle and limits water rotation across the full rack. Good Housekeeping identifies this as one of the most overlooked loading mistakes.
Angle cups and glasses so water runs off rather than pooling in the base. Load plastic lids lip-side down. Lightweight items that flip and collect water during the cycle should be anchored or hand-washed; they come out dirty and wet regardless of what else is done correctly.
There's a subtler reason to fix loading before diagnosing water quality: a partially blocked spray arm creates uneven rinsing, where some surfaces get a full rinse, and others don't. IV Appliance Clinic points out that this uneven exposure concentrates mineral deposits in predictable patterns on glassware, which is why loading problems and hard water problems can look identical. Eliminating the loading variable first makes the Stage 4 diagnosis cleaner.
Stage 3: Detergent, rinse aid, and cycle settings
These are the errors that are invisible until someone points them out. Each fix is a specific action, not general advice.
Detergent:
Place detergent packs in the dispenser compartment, not loose in the bottom of the tub. A pod dropped in the tub dissolves during the prewash and is flushed away before the main wash cycle begins. Detergent that doesn't survive to the main cycle doesn't clean dishes.
Buy only what can be used within two months and store it somewhere cool and dry, not under the sink, where humidity causes pods to clump or powder to cake. Degraded detergent performs badly regardless of how it's placed in the machine, per Good Housekeeping.
Wipe excess food off dishes before loading, but skip the full pre-rinse. Rinsing wastes water and isn't necessary when the filter is clean. Scraping is sufficient, according to Good Housekeeping.
Rinse aid:
Fill the rinse aid dispenser and keep it topped up, even if detergent pods claim to include rinse aid. Liquid rinse aid added to the designated compartment causes water to sheet off surfaces rather than evaporate in place, which reduces both spotting and drying time. Good Housekeeping's Home Care & Cleaning Lab calls it essential in hard-water households. In hard-water conditions specifically, changes to rinse aid levels may take two to three cycles to show results clearly.
Cycle selection:
Select the machine's drying boost option labeled TurboDry, Dry Boost, Power Dry, or similar. Low-heat and eco cycles save energy but leave dishes wetter and increase the surface time available for minerals to deposit. Boost mode uses slightly more energy; that's the tradeoff.
If dishes remain wet despite correct settings and a clean machine, a malfunctioning heating element may be the cause, according to Good Housekeeping, citing Whirlpool. That's a repair issue, not a settings or product problem.
Stage 4: If spots persist — diagnosing and fixing hard water
If the machine is clean, loading is correct, products are used properly, and dishes still come out cloudy or spotted, hard water is the most likely remaining cause. This is also the reason a dishwasher leaves spots on dishes even when everything else seems right.
Understanding the mechanism
Hard water contains elevated calcium and magnesium that dissolve naturally as groundwater moves through rock and soil. When that water heats up or evaporates inside a dishwasher, those minerals crystallize into scale, the chalky film on glassware, and the white crust on interior walls.
Adding more detergent makes the problem worse, not better. The minerals bind with the detergent before it reaches the dishes, reducing cleaning effectiveness and leaving additional residue behind. Scale on heating elements forces the machine to use more energy to reach operating temperature; deposits in spray arm holes restrict water pressure. Both effects accumulate gradually and invisibly.
Run the vinegar spot test first
Dab white vinegar on a spotted glass and wait one minute. If the spot clears, the calcium residue is manageable with the fixes below. If nothing changes, the glass surface itself has been etched from sustained mineral exposure. That damage is permanent. IV Appliance Clinic recommends acting on spotting early, before it crosses that line.
To understand how hard the home's water actually is, use an inexpensive test strip or check the local water utility's annual quality report. Water below 60 mg/L rarely causes visible spotting. Above 120 mg/L, the adjustments below are often worth making. Above 180 mg/L, near-term fixes manage symptoms but don't remove the underlying problem.
Near-term adjustments
Expect results over two to three cycles, not immediately.
Increase the rinse aid dispenser setting to level 4–5. The default level 1–2 doesn't deliver enough rinse aid to cut through elevated mineral concentrations. Adjust gradually and observe results over a few cycles before adjusting further.
Run Normal or Heavy cycles, which operate at approximately 130–150°F. Quick wash cycles run at around 104°F, too cool for the detergent to activate properly in hard water. Eco cycles vary and should be avoided when spotting is active. Before starting a heavy cycle, briefly run the kitchen tap to hot first; the dishwasher will fill with already-hot water rather than waiting for the line to warm up.
In hard water, switching from pods to powder gives more control over dosing. Pods are calibrated for average water conditions; in mineral-rich water, a fixed dose reacts with minerals before reaching the dishes. Starting with about 1 to 1½ tablespoons of powder per cycle and adjusting from there allows for more precise calibration.
For monthly machine cleaning in hard-water conditions, use citric acid rather than a standard dishwasher cleaner or vinegar. IV Appliance Clinic recommends it specifically because it reacts directly with calcium deposits, clears internal buildup faster, and is safe for regular monthly use. About half a cup in an empty machine on the hottest setting once a month is sufficient.
If the dishwasher has a built-in hard water or rinse optimization setting, enable it. Culligan notes these modes adjust temperature and water volume to compensate for elevated mineral content. They're worth activating before trying anything else.
The longer-term option
A whole-house water softener removes calcium and magnesium at the source via ion exchange, eliminating the underlying cause rather than managing its effects. Professional installation typically runs $800–$2,000 or more, depending on home size and hardness level. Culligan, a water treatment company with an obvious commercial interest in this recommendation, claims softened water can extend a dishwasher's useful life by up to 50%; that figure lacks independent corroboration and should be read as directional rather than precise.
For households above 180 mg/L where the near-term adjustments provide only partial relief, a softener is the most effective fix for removing the problem at its source. For everyone else, the adjustments above combined with clean-machine habits will produce clear, visible improvement.
What to do in order, and what to expect
Some improvements are immediate. Correct detergent placement and unblocking the spray arm show up in the very next cycle. Filter and gasket cleaning, done once and maintained on a regular schedule, sets the baseline for everything else.
Rinse aid and hard-water adjustments take longer; expect two to three cycles before the difference is obvious on glassware. If spotting persists after all four stages, stop guessing and test the water. At that point, the problem usually isn't the technique.
Scale accumulates faster in dishwashers than in most other appliances because of high operating temperatures. Left unaddressed, it restricts water flow, coats heating elements, and increases energy consumption. That makes this a maintenance issue with a real long-term cost, not just an aesthetic one worth tolerating.

















Comments
Be the first, drop a comment!