



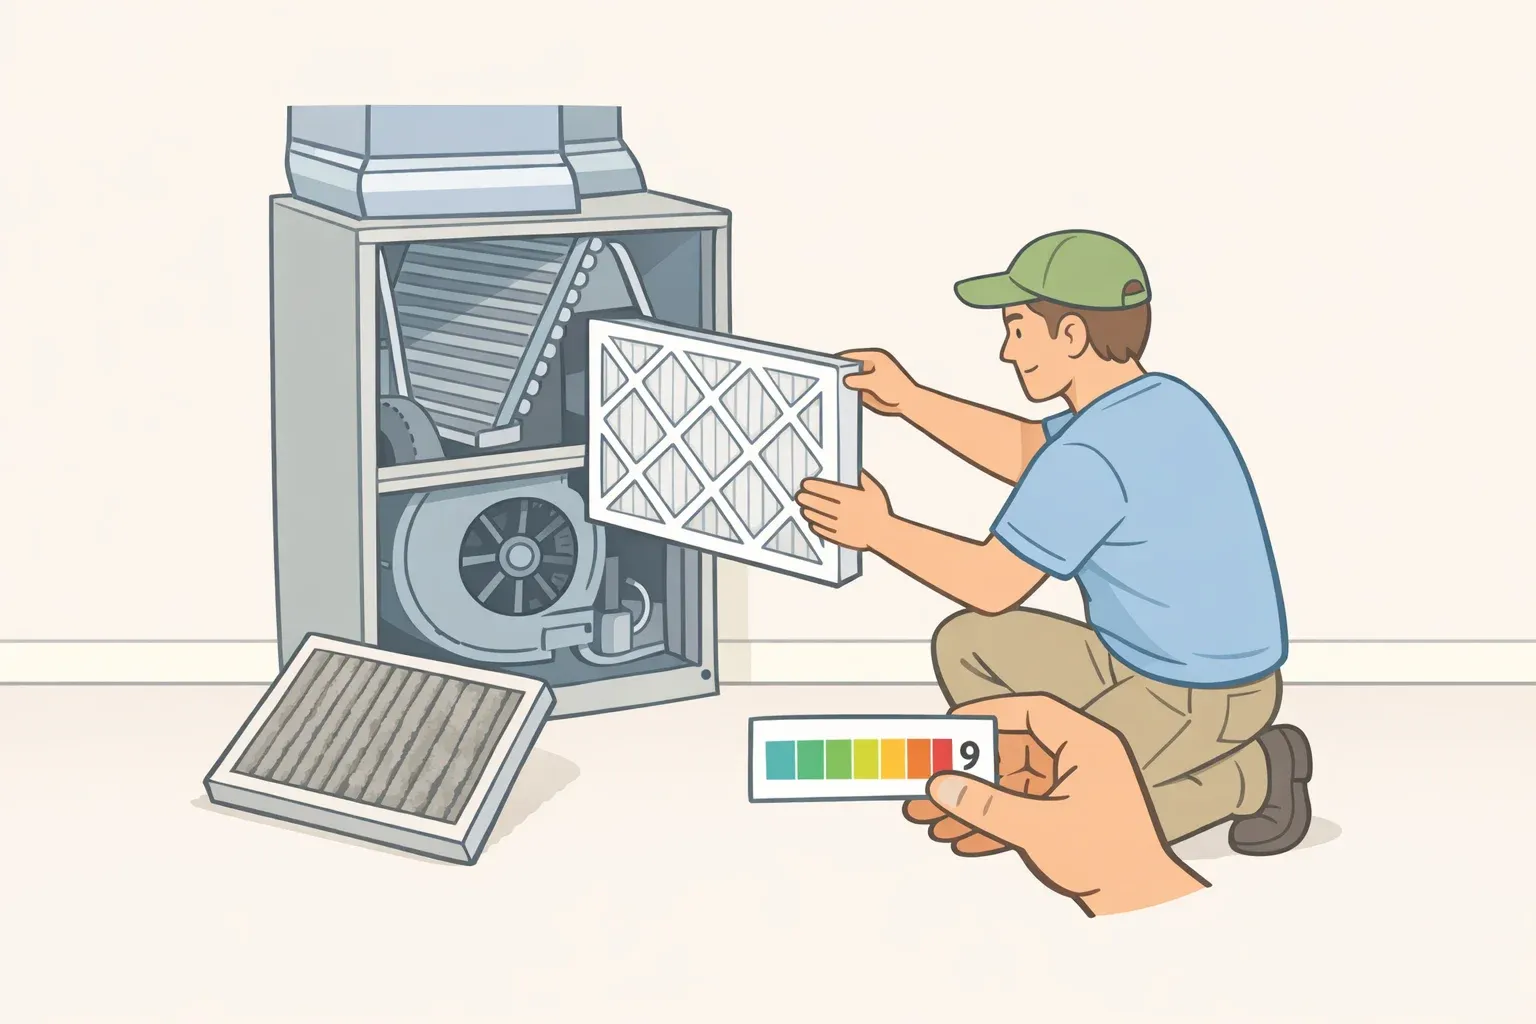
A dirty AC air filter can restrict airflow, make the system work harder, and allow dust to build up inside heating and cooling equipment. Checking the filter regularly and replacing it when it becomes dirty helps maintain airflow and can prevent avoidable HVAC problems.
The correct filter supports both indoor air filtration and the equipment moving air through the home. How often it needs replacing depends on the filter, the system, and conditions such as pets, smoke, renovation dust, and seasonal use.
This guide applies to disposable filters in ducted central air conditioners, furnaces, and ducted heat pumps. Window units, portable air conditioners, and ductless mini-splits often use different filter systems, so follow the appliance manual for those units.
What you'll need: A correctly sized replacement filter, a garbage bag, and a clean cloth for accessible surfaces around the filter slot.
Choose the right filter size and MERV rating
Before buying a replacement, identify the size your system requires and a filtration rating it can accommodate.
Find the correct filter size
Look for the dimensions printed on the frame of the existing filter, usually in a format such as 20 × 25 × 1 inches. Photograph the label before discarding the filter so you have a record of its size, MERV rating, and airflow direction.
If no filter is installed, check the equipment manual or the label inside the filter cabinet before measuring the opening yourself.
Filter packaging usually displays a nominal size, which is a rounded label rather than the filter's exact physical measurements. A filter labeled 20 × 25 × 1 inches may be slightly smaller in each dimension. Match the existing label or the manufacturer's specifications instead of rounding measurements from the filter slot.
The replacement should sit flat and fit snugly without being bent or crushed. A loose or undersized filter can leave gaps that allow air to pass around it rather than through it.
Residential filters commonly range from about 1 to 5 inches deep. The filter cabinet determines which depth fits. A 4- or 5-inch filter cannot replace a 1-inch filter unless the cabinet was designed or modified for it.
Choose a compatible MERV rating
MERV stands for Minimum Efficiency Reporting Value. It measures how effectively a filter captures particles between 0.3 and 10 micrometers. Higher ratings generally indicate better capture of smaller particles.
The Environmental Protection Agency recommends choosing MERV 13 or the highest rating the system can accommodate. A higher rating is not automatically suitable for every system, however. The filter must fit the existing slot, and the fan must be able to move sufficient air through it.
Check the equipment manual or consult an HVAC professional before upgrading. If compatibility is uncertain, match the rating on the current filter rather than assuming a higher-rated filter will work because it has the same dimensions.
Lower-rated filters can capture larger particles and help protect equipment, but they generally provide less effective fine-particle filtration than higher-rated compatible filters.
When a MERV 13 filter makes sense
A MERV 13 filter can be particularly useful when a household is dealing with wildfire smoke, fine-particle pollution, or similar airborne-particle concerns. Use one only if it fits the existing slot and the system can accommodate it.
Avoid these common mistakes:
Do not install the filter backward.
Do not stack filters unless the system was designed for that arrangement.
Do not force a thicker filter into a cabinet intended for a thinner one.
Do not switch to a higher MERV rating without checking compatibility.
How often to change an AC air filter
Check the filter once a month, especially during periods of heavy heating or cooling use. Replace it when it looks dirty, and follow the filter and equipment manufacturers' instructions.
ENERGY STAR advises checking HVAC filters monthly, replacing them when they look dirty, and changing common filters at least every three months. Some households will need to replace them sooner.
Filters can become dirty faster in homes with:
Pets
Tobacco smoke
Renovation or construction dust
Open windows in dusty conditions
Long heating or cooling runtimes
Several occupants
Nearby wildfire smoke
Deeper media filters may last longer than standard 1-inch filters because they have more filter surface area. Their service life still varies by product and system, so follow the manufacturer's replacement instructions instead of assuming they will last a full season or year.
Conditions that shorten filter life
Long HVAC runtimes: During very hot or cold periods, the system moves more air through the filter. Check it more frequently when the equipment runs for much of the day.
High-pollen periods: Inspect the filter more often when local pollen levels are high. Pollen seasons vary by climate and region, so a fixed calendar is not reliable.
Construction or renovation work: Drywall dust, sawdust, and other debris can load a filter quickly. Inspect it frequently during and after dusty work, and replace it when the surface becomes heavily loaded.
Wildfire smoke: Smoke can soil filters faster than normal. Keep spare filters available when smoke is expected, and inspect the installed filter frequently.
What to do during wildfire smoke
Keep windows and doors closed when outdoor air is smoky. If the HVAC system has a fresh-air intake, close it or switch the system to recirculation mode.
The EPA's wildfire and indoor air quality guidance recommends considering a MERV 13 filter—or the highest rating the system can accommodate—and checking it frequently during smoke events. If a high-efficiency filter is installed, running the system fan more often can increase filtration while outdoor air quality is poor.
Return the fan to its normal setting when conditions improve to limit unnecessary electricity use. Replace the filter when it looks heavily soiled or begins releasing a smoke odor.
Signs the filter needs replacing
A filter may need attention before its expected replacement date. Inspect it when airflow drops, the system begins running longer than usual, or the filter appears heavily loaded or damaged.
Replace the filter when you notice:
Heavy dust covering much of the surface
A filter that has collapsed, torn, or shifted out of its frame
Dampness or visible mold
Heavy discoloration or a smoke odor during a wildfire event
Large gaps that allow air to pass around the filter
Do not rely on a light test alone. Dense pleated filters may transmit little light even when they are still usable.
Reduced airflow or unusually long heating and cooling cycles can indicate a dirty filter, but these symptoms may also have other causes. Check the filter first, then seek professional help if the problem continues after a clean filter is installed.
Ice on the indoor coil or refrigerant lines also requires prompt attention. Turn the system off, check the filter, and contact an HVAC professional if the icing continues. Restricted airflow is one possible cause, but refrigerant and mechanical problems can produce similar symptoms.
Turn the system off and arrange an inspection if it produces banging, grinding, burning odors, or other unusual signs. Replacing the filter alone may not correct a mechanical problem.
How to change an AC air filter
Step 1: Set the thermostat to Off
Make sure the blower is no longer running before opening the return grille, filter cabinet, or access panel.
Step 2: Locate the filter
The filter may sit:
Behind a wall or ceiling return grille
In a slot beside the furnace or air handler
Inside a dedicated media-filter cabinet
Beneath an upflow furnace or air handler
Return grilles pull air into the system. Supply registers blow heated or cooled air into rooms.
Check the equipment manual if the filter is not easy to find. Some systems use more than one return filter, while others have a single filter beside the equipment. Do not add filters to every return grille unless the system was designed for that arrangement.
Step 3: Remove the old filter carefully
Slide the filter out without shaking or tapping it. Place it directly into a garbage bag to keep accumulated dust from spreading through the room.
Before disposal, photograph the size label, MERV rating, and airflow arrow.
Step 4: Clean accessible surfaces
With the system off, wipe dust from the return grille and the accessible edges of the filter slot. Do not reach into electrical or mechanical compartments, and do not allow water to drip into the equipment.
Step 5: Unwrap the new filter
Remove the plastic packaging, but leave the filter frame intact. Check the dimensions and MERV rating once more before installation.
Step 6: Point the airflow arrow toward the equipment
Find the arrow printed on the edge of the filter. It should point in the direction the air travels—away from the return grille and toward the furnace, air handler, or blower.
The Pacific Northwest National Laboratory's filter installation instructions also specify leaving the cardboard frame in place and aligning the arrow with the direction of airflow.
Which way does an AC filter go? The arrow points toward the HVAC equipment, not toward the room.
Step 7: Slide the filter into place
The filter should sit flat and snug without being forced. If it bends, buckles, or leaves large gaps, remove it and confirm the size before continuing.
Do not crush a filter to make it fit. A damaged or poorly fitted filter may allow air to pass around its edges.
Step 8: Close the grille or access panel
Secure any clips, latches, levers, or covers so the filter remains seated during operation. A loose panel may allow air leakage or cause rattling.
Step 9: Record the installation date
Write the installation date on the filter frame. You can also set a monthly reminder to inspect it.
Do not cover the airflow arrow or size information.
Step 10: Restart the system
Return the thermostat to its normal setting and confirm that air is moving normally.
Turn the system off and seek professional help if it rattles, bangs, produces a burning odor, or continues to have unusually weak airflow.
Keep the filter easy to check
A successful filter change comes down to four checks:
Match the labeled size.
Choose a compatible MERV rating.
Point the airflow arrow toward the equipment.
Inspect the filter regularly.
MERV 13 can improve fine-particle filtration when the system supports it. If compatibility is unclear, continue using the existing rating until the equipment manual or an HVAC professional confirms that the system can handle an upgrade.
HVAC filters cannot remove every indoor pollutant. Source control and ventilation with clean outdoor air remain important. For additional particle control, the EPA recommends choosing a portable air cleaner that is properly sized for the room and does not intentionally produce ozone.















Comments
Be the first, drop a comment!