



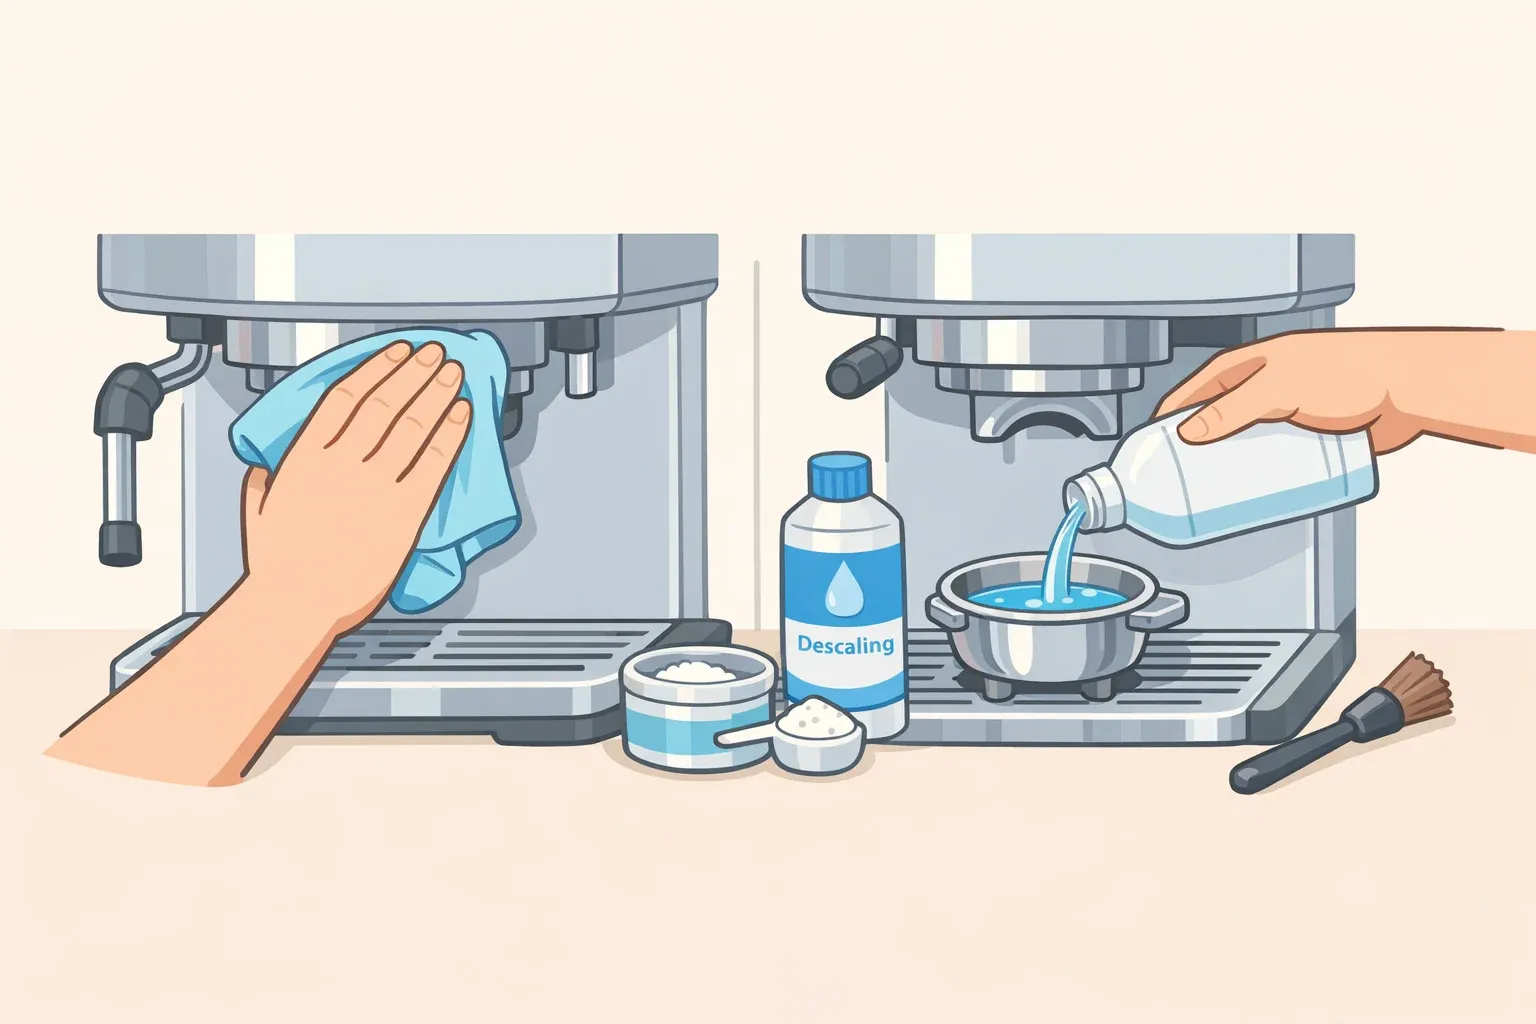
Here's the cadence: a two-to-three-minute rinse and dry-down after your last brew each day, a 15-to-20-minute espresso-machine cleaner cycle once a week, and a descale plus filter check every one to three months. That's how to clean a Breville espresso machine without overdoing it and without giving mold a foothold. The mold risk is real: Breville machines run warm and wet, which makes them easy environments for microbial growth if residue and standing water are left unchecked, as Good Housekeeping noted in a recent cleaning guide.
Before running this routine, check whether you're already dealing with contamination rather than just preventing it. Four signs you may have a problem: a sour or musty smell from the coffee or reservoir; cloudy or discolored water; visible black or green spots near the drip tray or grouphead; or slower brewing speed than usual, per Simo Caffè. If any of those apply, skip to the troubleshooting section below first.
Coffee oils can stale quickly after brewing, especially when residue is left exposed to air. Biofilm, a thin layer of microorganisms that can adhere to internal parts, can become harder to remove once it forms and may contribute to clogs, odors, or off flavors, according to Simo Caffè.
Before you start: what your model determines
What you'll need on hand: espresso machine cleaning tablets or a Breville-approved cleaning solution, a dedicated descaling solution, a soft cloth, and a grouphead brush. Cleaning tablets are a weekly-to-monthly supply depending on your model and use; descaler is monthly-to-quarterly; replacement water filters are usually every two to three months, depending on your model, filter type, and water hardness.
Check your model manual before running any backflush or descale cycle. The Bambino and Bambino Plus handle grouphead cleaning differently than the Barista Express or Oracle. Some models run automated cleaning cycles; others require manual steps. Daily wipe-down tasks are universal; backflush, descale, and shower screen removal depend on model. Where this guide gives backflush or descale instructions, treat them as the general logic; your manual specifies the exact cycle.
When this guide and your manual conflict, follow the manual.
How to clean a Breville espresso machine daily: under 3 minutes
Mikael Jasin argues that these quick daily tasks prevent many common maintenance problems. The logic is simple: remove residue, milk, and standing water before they have time to build up.
Do all four steps after your final brewing session of the day.
Step 1: Flush the grouphead, or backflush it if your model supports that process. For models that use a blind basket or cleaning disc, run a short water-only cycle with no cleaning solution to clear loose grounds and oils. For models with an automated rinse or different cleaning process, follow the manual instead. Check that the water runs clear by the end of the cycle.
Step 2: Purge and wipe the steam wand. If you made any milk-based drink, purge steam through the wand for 3-5 seconds to clear milk from inside the tube, then wipe the exterior with a damp cloth. Milk residue can support bacterial growth if it sits in the wand. Don't plan to get it later; dried milk is a different problem entirely.
Step 3: Refresh the water tank and let it air out as needed. Empty stale water, especially if the machine will sit unused overnight or longer. Refill only what you expect to use the next day, and leave the lid open briefly so residual moisture can escape. Wash the tank thoroughly every two to three weeks.
Step 4: Leave the portafilter unlocked. Don't lock the portafilter into the grouphead while the machine sits overnight. Leaving it unlocked helps the gasket last longer. Rest it loosely in the group or set it aside.
The weekly routine: 15-20 minutes, once a week
Weekly cleaning reaches the components the daily rinse doesn't fully address: grouphead internals, shower screen, portafilter basket, steam wand, and drip tray. Breville recommends cleaning most machine components at least weekly for anyone brewing two to five cups per day.
Step 5: Run the model-approved cleaning cycle or chemical backflush. If your model uses a blind basket, cleaning disc, or cleaning tablet, insert the part and cleaner your manual specifies. Run the cycle for the number of pulses or minutes your manual specifies. This cleans the group head and related brew-path parts exposed to pressurized coffee oils.
On cleaning products: use espresso-specific tablets or the solution your Breville manual recommends. Breville specifies store-bought espresso cleaning solution for deep cleans. Do not substitute vinegar unless your manual allows it; use machine-specific cleaners for cleaning cycles and a dedicated descaling solution for descale cycles. Check your manual before using it.
Step 6: Scrub the shower screen. Remove the shower screen and use a grouphead brush to clear coffee residue from the dispersion holes. Rinse well and reattach. Once a month, soak the screen in cleaning solution rather than just brushing it.
Step 7: Deep-clean the steam wand. Beyond the daily purge, soak the tip in warm water for a few minutes to loosen any residue that survived the daily wipe, then purge again. Milk residue that hardens is easy for bacteria to colonize.
Step 8: Soak the portafilter basket. Remove the filter basket and soak it in hot water mixed with espresso cleaning powder for approximately five minutes. Rinse thoroughly before reassembling. Check basket holes for blockages while it soaks.
Step 9: Wash and inspect the drip tray. Pull the drip tray out fully and wash it with warm soapy water. Clean the float sensor while you have it out; residue on the sensor can trigger false overflow alerts. Dry everything completely before reinserting. If your machine smells off after everything else is clean, the drip tray is the first place to check for mold.
Every 2-3 weeks: Wash the water tank itself with mild soap and warm water. Breville identifies the water tank as a component that only needs thorough cleaning every two to three weeks rather than weekly. If your Breville has an integrated grinder, clean the hopper and grinder area every two to three weeks according to the manual.
What to expect after Step 9: No visible residue on the shower screen, portafilter basket holes, or drip tray. The grouphead runs clear water freely. If the first shot after the chemical backflush tastes slightly off, pull two or three shots and discard them to flush residual cleaning solution from the lines.
Monthly to quarterly: descaling, filters, and gaskets
Daily and weekly habits handle residue; longer-interval tasks address mineral scale, filter saturation, and gasket wear.
Step 10: Descale the boiler (every 1-3 months, depending on water hardness). Scale builds inside the boiler, tubes, and seals wherever hard water flows, insulating heating elements and reducing water flow. Descale monthly with hard tap water; every two to three months with filtered or soft water.
Remove the water filter before starting; leaving it in may cause it to absorb the descaling solution. Add descaler per product instructions, run the descale cycle your model specifies, then run a full water-only rinse cycle to flush the cleaning agent. A second flush is a good idea before inspecting the machine. If your machine has a descale indicator light, don't ignore it.
Step 11: Replace the water filter every two to three months, or as your manual directs. A clogged filter can encourage stagnant water, which bacteria thrive in. Good Housekeeping gives three months as a typical interval, while some Breville manuals point to a two-month replacement schedule, so check your model and shorten the interval if you have hard water. Budget roughly $30-50 annually for six filters.
Step 12: Inspect the grouphead gasket (every 3 months; replace every 6-12 months). The rubber gasket degrades over time. Check it quarterly and replace it every six to twelve months sooner if you notice leaks or the portafilter seating poorly. At $10-15 per gasket for one to two per year, it's a minor cost relative to what a degraded seal can do to extraction quality.
Troubleshooting: if this, do that
Musty or sour smell after routine cleaning: Check the drip tray for mold first. Don't skip the float sensor.
Chemical taste in first shots after backflush: Pull and discard two or three shots to flush residual cleaning solution from the lines.
Cloudy reservoir water or visible discoloration: Stop using the machine until it's cleaned thoroughly. Empty and wash the tank, replace the water filter, and run a descale cycle before resuming.
Black or green spots near the grouphead or drip tray: Stop using the machine and run the full weekly and monthly protocols before resuming. If spots return quickly, the contamination may be deeper than surface cleaning can reach.
Recurring odor or taste problems that survive thorough cleaning: Pumps, boilers, and internal lines are beyond home maintenance. A technician can clean inside those components with specialized tools. If problems keep returning after you've run this full protocol, that's the escalation point.
Safety: Never submerge electrical components in water. Make sure every part is fully dry before reassembling after any cleaning step.
Your cleaning routine at a glance
FrequencyTasksTimeDailyWater backflush, steam wand purge + wipe, empty tank + open lid, portafilter unlocked2-3 minWeeklyChemical backflush, shower screen scrub, steam wand deep clean, portafilter soak, drip tray wash15-20 minEvery 2-3 weeksFull water tank wash5 minMonthly (hard water) / Every 2-3 months (soft/filtered)Descale, water filter replacement check30-45 minEvery 3-12 monthsGrouphead gasket inspection and replacement5-10 min
Cleaning tablets, descaler, filters, and occasional gaskets add some ongoing cost, but routine maintenance is still modest compared with the price of the machine and can help it last longer.
One thing worth noting as your usage changes: if you start brewing more cups per day, compress the weekly schedule. If the machine sits unused for several days, run a water-only backflush before your first brew back. The cadence here assumes two to five cups daily; adjust it to fit how you actually use the machine, and the routine stays ahead of the problems rather than chasing them.















Comments
Be the first, drop a comment!