




How to Clean a Dryer Vent This Fall: A Safety Guide
Emptying the lint trap after every load feels like real dryer maintenance, and in a way it is. But laundry experts point out that habit never touches the exhaust vent, the duct that actually carries hot, moist air out of your house. The lint screen only catches lint inside the machine; the vent is a separate system, and learning how to clean a dryer vent properly, not just the trap inside it, is the piece most households skip (Good Housekeeping; The Lint King).
This isn't only about shaving minutes off a drying cycle. The U.S. Fire Administration found that failure to clean was the leading factor behind 31% of home clothes-dryer fires from 2018 to 2020 (USFA). Fall gives you a practical reason to check now rather than later: leaf season tends to pile debris right at the exterior vent opening, and clearing lint, leaves, and nesting material from that cap is a basic part of seasonal dryer vent maintenance (SpeedQueen Dryer Repair).
This guide walks through how to tell whether your vent needs attention, how to clean an accessible vent yourself safely, and when to hand the job to a professional instead. It applies to standard vented dryers. Heat-pump dryers run a closed-loop system with no comparable exterior exhaust vent, so skip the cleaning steps below entirely if that's what you own (The Lint King, citing ENERGY STAR).
Why you should clean your dryer vent every fall
Lint buildup inside the vent restricts airflow, which forces the dryer to run hotter and less efficiently. Because lint is combustible, excess buildup also raises fire risk, according to Noah Pinsonnault, a reviews analyst at the Good Housekeeping Institute Home Care & Cleaning Lab (Good Housekeeping).
A clear vent path cuts energy use and reduces unnecessary wear on the appliance, while a blocked one tends to stretch out drying cycles (Good Housekeeping). That buildup happens slowly, which is the catch. A dryer that still seems to run fine doesn't necessarily have a fully clear vent, since lint accumulates gradually rather than causing a sudden, obvious drop in performance (Good Housekeeping).
That's the gap worth closing. Cleaning the lint screen and dryer vent cleaning are two separate jobs, and most households only ever get around to the first one.
Signs of a clogged dryer vent
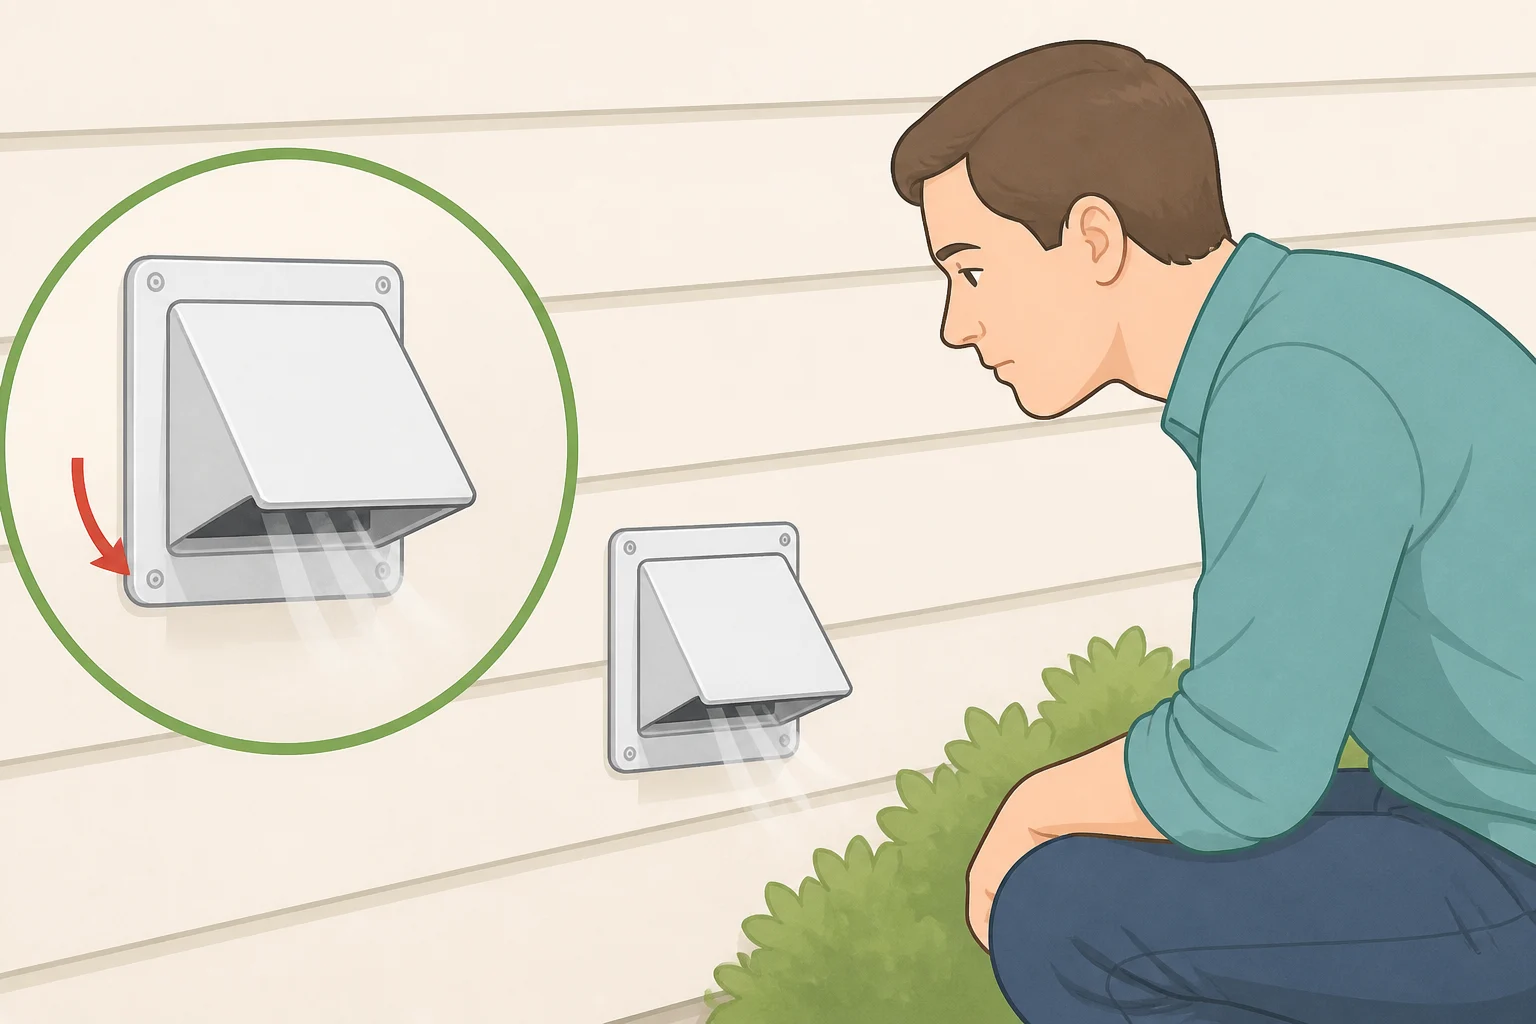
Good Housekeeping notes that clothes taking longer than usual to dry, a dryer that runs unusually hot, or weak airflow at the outdoor exhaust vent are all possible signs of lint buildup (Good Housekeeping). SpeedQueen's seasonal maintenance guide adds a few more clues worth watching for:
- Clothes that come out warm but still damp at the end of a cycle
- A laundry area that feels unusually dusty
- An exterior vent flap that barely moves when the dryer runs
- A musty smell near the outdoor vent opening
(SpeedQueen Dryer Repair)
Checking whether the exterior flap opens during a normal cycle is a useful first screen, but it isn't proof the hidden duct behind it is clear. The Lint King points out that lint can build up well before airflow stops entirely, so a flap that swings fine doesn't guarantee a clean run the rest of the way (The Lint King). Longer drying times can also point to a restricted lint screen or an unrelated appliance problem rather than a blocked vent alone, so cleaning won't necessarily resolve every drying complaint on its own (The Lint King).
Check whether this is a safe DIY job
Before you gather tools, confirm your setup actually fits the method below. This job is a reasonable DIY task when all of these are true:
- The dryer's vent connection is easy to reach without major lifting or straining
- The vent run is short and visible, not buried behind walls or packed with multiple turns
- The dryer isn't stacked on another appliance or wedged into a tight closet
- Nothing about the setup requires disconnecting a gas line
- The dryer hasn't been overheating or giving off a burning smell
If any of those don't apply, skip ahead to the professional section below instead of starting the steps. The Lint King is specific on this point: don't pull a heavy or stacked appliance out, disturb a gas line, or remove service panels just to get through a seasonal check (The Lint King).
Gas dryers need one extra layer of caution. If you have a gas dryer and it's safe to move, shut off the gas supply valve before you touch any connection. If moving the appliance at all would strain the gas connector, or the hookup is tight enough that you'd have to force it, stop there and call a technician instead of improvising (SpeedQueen Dryer Repair).
What you'll need
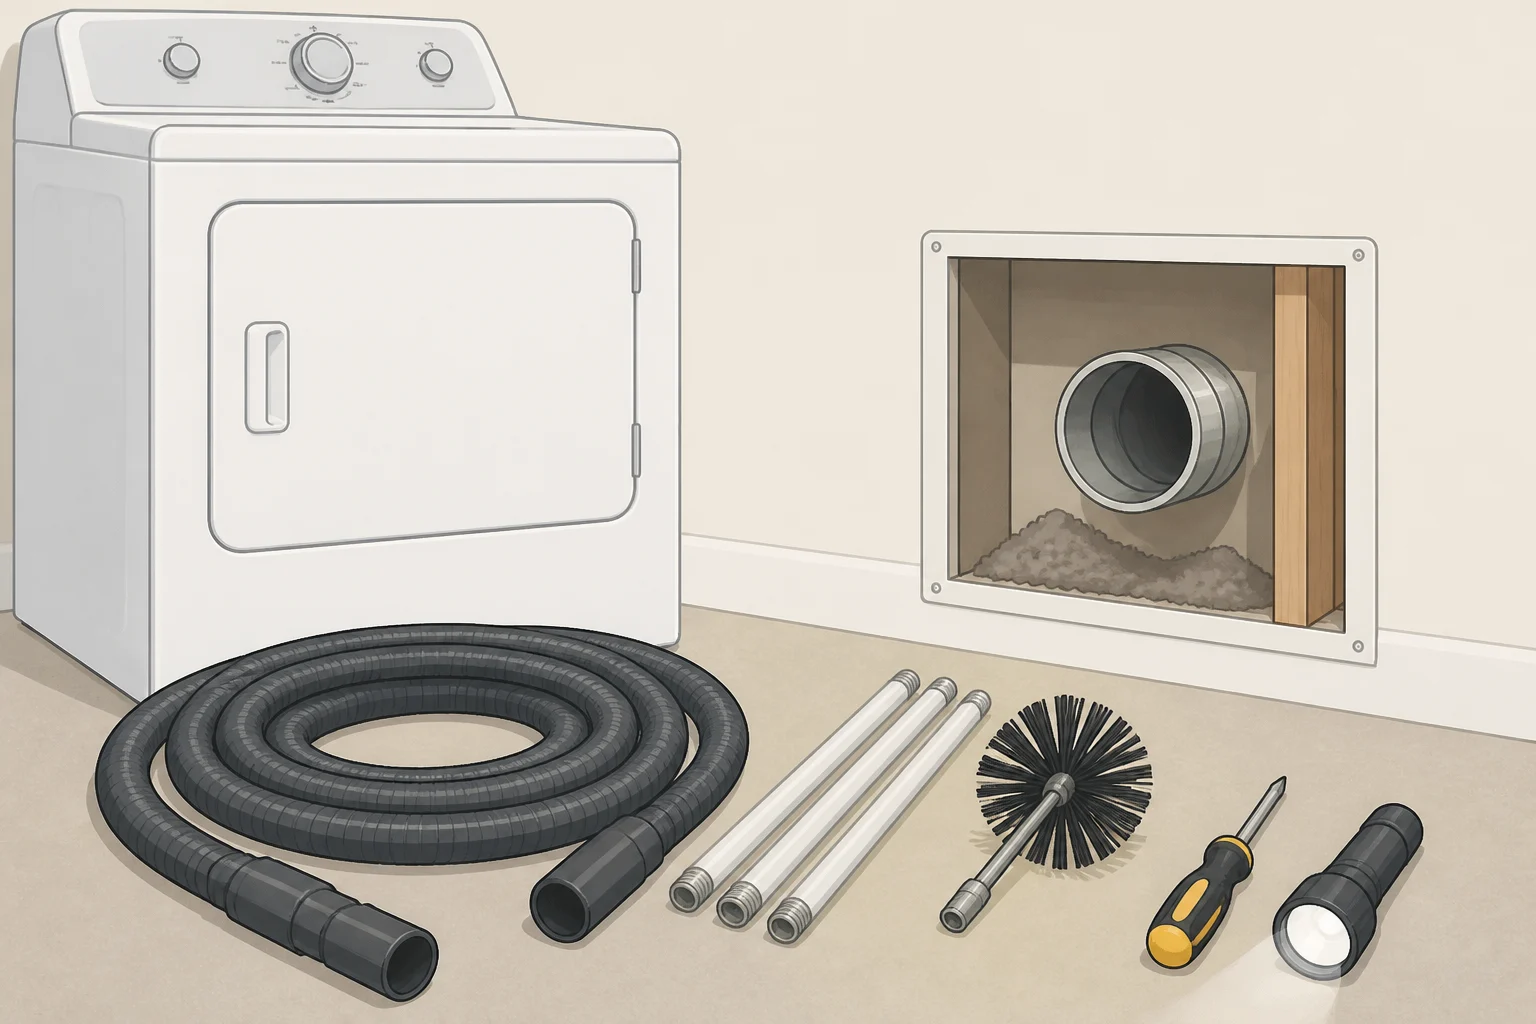
Gather these before touching anything:
- A vacuum with a hose attachment
- A flexible dryer vent brush kit
- A screwdriver
- A flashlight
(SpeedQueen Dryer Repair)
Check your dryer's manual first for any model-specific instructions before disconnecting anything (Good Housekeeping). And as covered above, this method is for conventional vented dryers only; skip it if yours is a heat-pump model.
How to clean a dryer vent safely
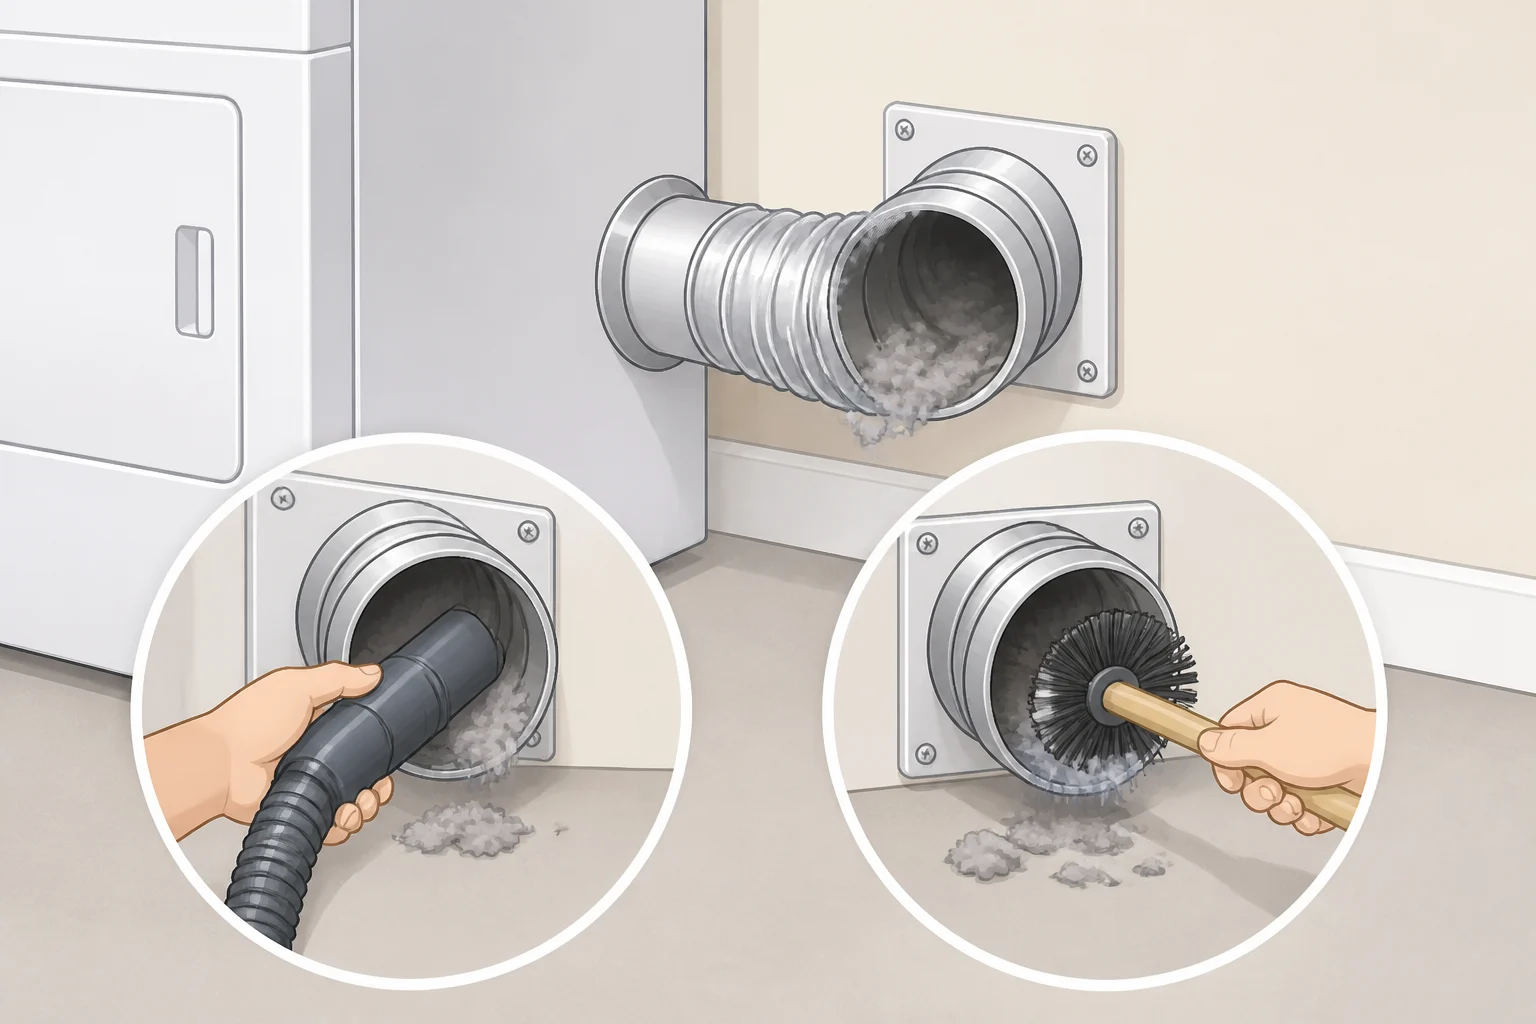
- Unplug the dryer. If you have a gas dryer, shut off the gas supply valve too, and let the machine cool if it's been running recently before you touch any connections (SpeedQueen Dryer Repair).
- Pull the dryer forward carefully so you can see the vent connection at the back, using the flashlight if the space is dim. While you're back there, look over the hose for any kinks or crushed sections; a damaged hose needs replacing, not just cleaning (SpeedQueen Dryer Repair).
- Loosen the clamp and disconnect the duct from the dryer outlet (Good Housekeeping; SpeedQueen Dryer Repair). If the duct comes apart somewhere it shouldn't, or you find a section that's clearly crushed, stop and note it. A vacuum and brush can clear lint, but they won't fix a damaged connector (The Lint King).
- Vacuum the dryer's outlet and the first section of duct. Check what you can reach for visible buildup before moving on (Good Housekeeping).
- Work a vent brush through the accessible duct length in short sections, vacuuming again after brushing to pull out the lint you've loosened (SpeedQueen Dryer Repair).
- Go outside and clear the exterior vent cap of leaves, lint, dust, or nesting material. Confirm the flap swings freely once it's clear (SpeedQueen Dryer Repair; Good Housekeeping).
- Reconnect the duct and secure the clamp, then push the dryer back into place without crushing the hose. Run a short, ordinary test cycle. During that cycle, watch the exterior flap to confirm it opens, and check for warm, steady airflow coming out (SpeedQueen Dryer Repair; The Lint King).
Don't run a dryer that's overheating or smells like burning just to test whether the vent is clear. Stop and arrange service instead (The Lint King).
When to call a professional instead
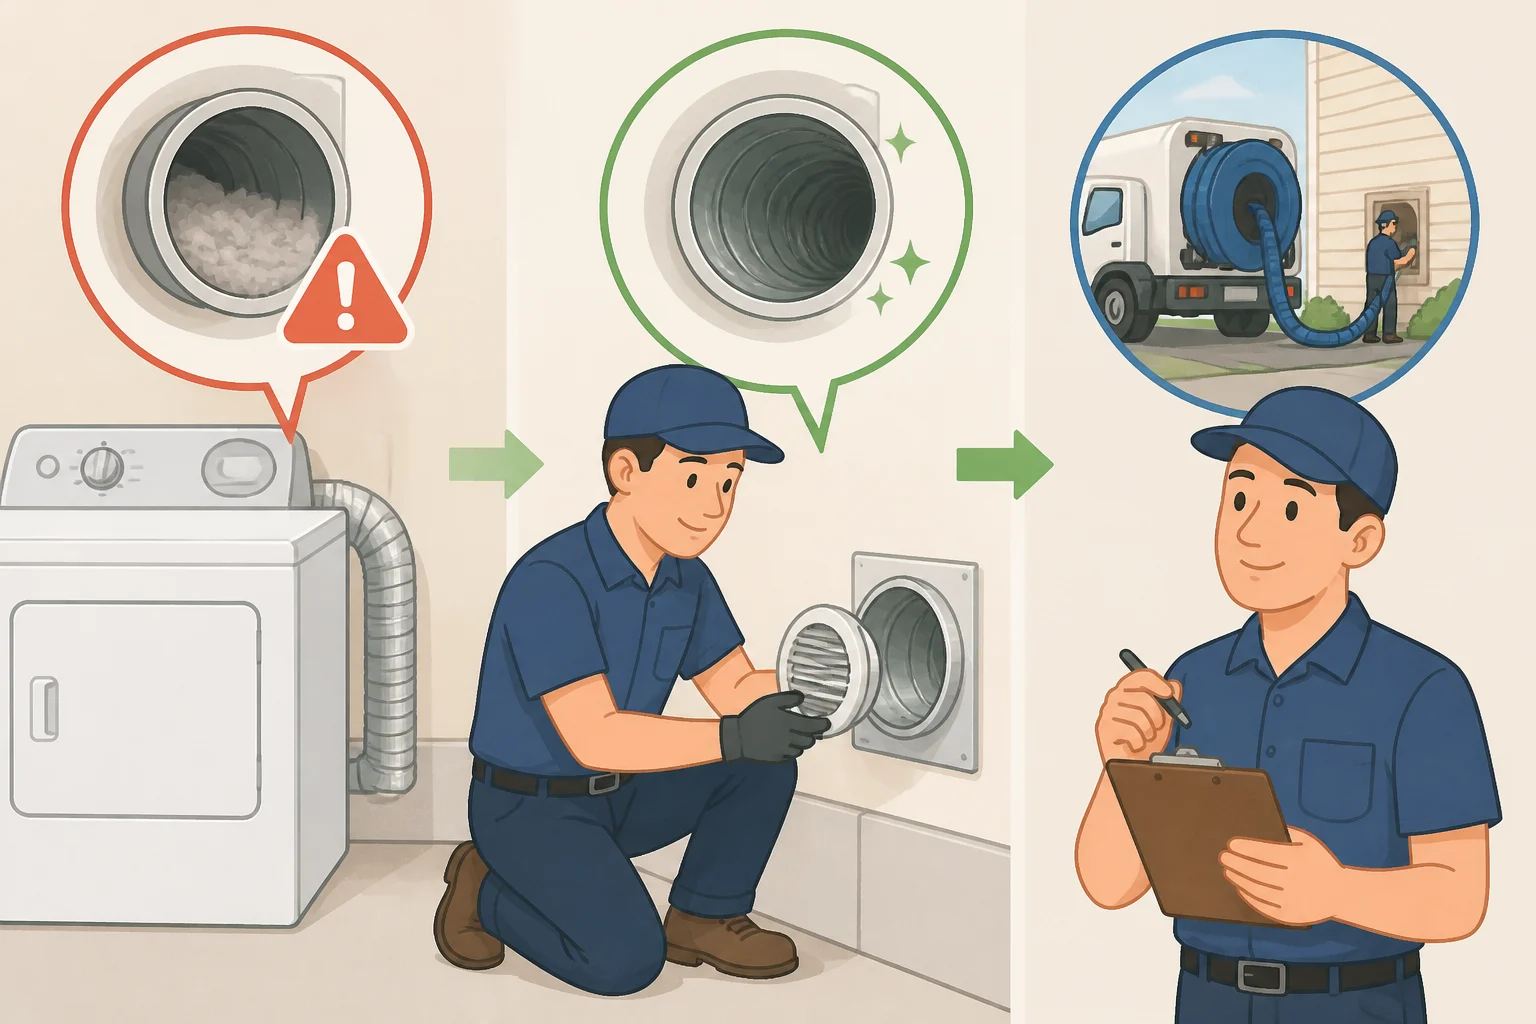
For long or complicated duct runs, significant blockages, or any setup that would require disconnecting a gas line, Pinsonnault recommends hiring a professional rather than tackling it yourself (Good Housekeeping). A pro can also reach sections of the duct that are hard to access and check for obstructions that aren't visible from either end.
If your dryer flashes an AF or "Check Vent" alert, Whirlpool's troubleshooting guidance for applicable models recommends confirming that the accessible run and exterior hood are clear first, then running the dryer for five to ten minutes and checking air movement at the exhaust hood by hand. If the alert persists after that, the manufacturer advises having the entire home vent run cleaned by a venting specialist rather than continuing to troubleshoot it yourself (Whirlpool, 2023). That guidance applies to Whirlpool's own error-code system; other brands may flag restricted airflow differently, so check your own manual if your dryer uses a different alert.
The material of the duct itself matters too, not just how much lint is inside it. The Consumer Product Safety Commission recommends replacing flexible plastic or foil accordion-style ducting with suitable metal ducting, since the shape of flexible ducting can trap lint more easily than a smooth metal run (The Lint King, citing CPSC).
Some signs call for stopping immediately rather than scheduling a cleaning appointment. A burning smell or abnormal overheating means stop using the dryer and call for service right away. If you see smoke or fire, leave the house and call 911 rather than trying to troubleshoot further (The Lint King).
Finishing up
Plan on a full vent cleaning at least once a year, more often if you do laundry frequently or have a long, complex vent system (Good Housekeeping). Keep wiping out the lint screen after every load between those deeper cleanings; it's still the single habit that prevents the most buildup, just not a substitute for checking the vent itself (The Lint King).
After you've reassembled everything, confirm four things before calling it done: the duct connection is secure, the hose isn't crushed or kinked behind the dryer, the exterior flap opens during a normal cycle, and the exhaust air coming out of the cap feels warm and steady rather than weak. If all four check out, you're finished.
If drying times stay long or clothes keep coming out damp even after all four of those check out, treat that as a separate appliance issue rather than assuming the vent needs another pass. Have it diagnosed instead of repeating the cleaning (The Lint King).

















Comments
Be the first, drop a comment!