



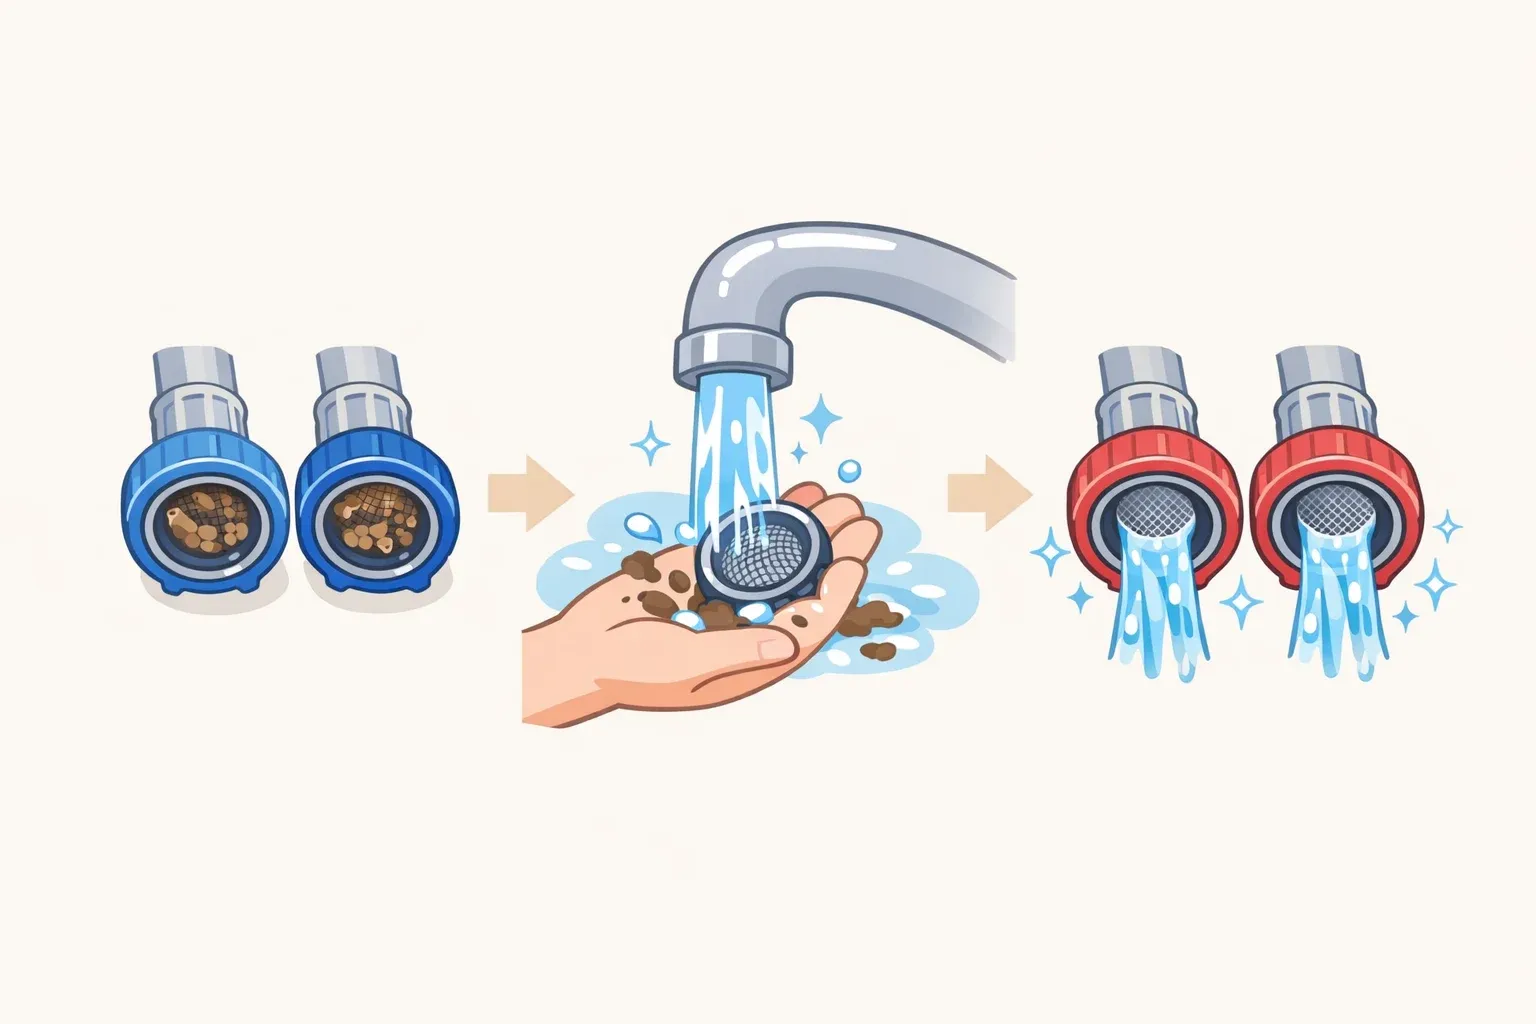
A washer that suddenly takes forever to fill, or won't fill at all, doesn't necessarily need replacing. A clogged mesh screen tucked inside the hose connection at the back of the machine is a common cause, and it's a part most owners have never laid eyes on.
When a front-load washer won't fill or fills slowly, Whirlpool's troubleshooting guidance checks this screen among the first steps, and learning how to clean a washing machine inlet filter is often enough to get water flowing normally again.
The inlet screens are a separate pair of mesh discs, one for hot water and one for cold, sitting exactly where the supply hoses connect to the machine. Tap water carries trace mineral deposits, rust flecks, and fine grit that settle on that mesh over months, and hard water speeds up the buildup considerably.
This guide covers where to find the filter, how to clean a washing machine water inlet filter safely in a few minutes, what to do about stubborn limescale, and how often the job actually needs doing based on the water coming into the house, not a fixed number on a calendar.
Where is the washing machine water inlet filter located?
The screens sit just inside the hot and cold water ports on the back of the machine, filtering incoming water before it reaches the inlet valve. Pull the washer away from the wall and look at the two threaded connectors where the supply hoses attach. Inside each one is a small mesh disc, easy to miss unless someone's specifically looking for it.
This isn't the drain-pump filter at the front of the machine, which deals with lint and debris on the way out of the wash, not on the way in. Confuse the two and the actual clog sits untouched while the wrong part gets scrubbed.
The cold screen tends to clog first. Most modern wash cycles default to cold water, so it sees more flow over the life of the machine and often accumulates buildup faster than the hot-side screen. Knowing exactly what to look for, and what it isn't, saves time when a fill problem shows up and the instinct is to start taking things apart.
Signs you need to clean the inlet filter (before you start)
The tell is usually in how water enters the drum, not in how the machine behaves otherwise. Watch for slow filling, inconsistent water flow, cycles that run long because the machine is waiting on water level, fill-related error codes, or no water entering the drum at all. Any of these is a reasonable trigger to check the screens before assuming something more serious is going on.
Cleaning the screen doesn't always solve it, though. If filling is still slow afterward, the problem has likely moved upstream, either to household water pressure or the inlet valve itself. More on diagnosing that further down.
Winter adds a wrinkle. A sudden loss of cold fill, particularly when the supply line runs along an exterior wall or through an unheated space, can point to a frozen pipe rather than a clogged screen. Warming the pipe is worth trying before taking anything apart. Cleaning the inlet filter is a sensible first step for most fill problems, but it's a first step, not a guaranteed fix, and knowing that going in keeps the rest of this process from wasting anyone's time.
How to clean a washing machine inlet filter step by step
Set aside a soft toothbrush, a bucket or old towel, and the owner's manual for the specific machine, if it's still around. Needle-nose pliers and white vinegar only come into play if the manual confirms the screen can be removed, or if limescale needs separate treatment, covered below.
One rule before touching anything: don't pull a screen out unless the manual for that model says removal is fine. Whirlpool's own guidance is to clean the screens in place, without removing them, using a toothbrush, mild soap, and water. Other repair sources describe gently pulling screens out with pliers or fingers instead. When the manual is silent or missing, clean in place. It's the safer default, and it still gets the job done.
Unplug the washer completely, then shut off both water valves, turning them clockwise until they stop.
Slide the machine out slightly and disconnect the hoses, keeping a bucket or towel underneath for any water that drains out.
Locate the screens inside each port and clean them according to the rule above, in place with a toothbrush, mild soap, and water, or eased out with pliers or fingers only if the manual allows it.
Rinse and brush gently under warm running water. Avoid heavy pressure, since the mesh deforms easily, and replace rather than reinstall a bent screen, since a warped screen lets through the debris it's supposed to catch.
Check the rubber washer inside each hose fitting before reconnecting. A cracked or flattened washer causes a slow drip at the connection later on, and replacements are stocked at any hardware store.
Reconnect the hoses, restore water slowly, and check for drips at the connections before running a short rinse cycle to confirm the machine fills normally again.
Seat the screen straight when putting it back. Forcing it in at an angle bends the mesh and turns what should be a quick job into a parts replacement.
How to remove limescale from a washing machine inlet filter
Not all buildup looks the same, and color is a decent clue. A chalky white or grey crust points to mineral scale from hard water, while rust-colored deposits usually mean sediment from aging pipes, and those tend to rinse away without extra help.
Vinegar is the standard fix for the chalky kind, though sources disagree on how long to soak: one suggests 20 to 30 minutes, another recommends several hours or overnight in undiluted vinegar, and a third calls for a diluted 50/50 vinegar-water mix for about 30 minutes. Given that spread, a shorter soak followed by a check makes more sense than committing to an overnight bath right away, and only if the manual confirms the screen comes out. Rinse thoroughly afterward regardless of how long it sat.
Some sources mention CLR, a calcium, lime, and rust remover, for deposits vinegar won't shift. The manufacturer guidance cited here doesn't recommend CLR for inlet screens specifically, so the owner's manual is the better deciding factor than reaching for a stronger chemical because it happens to be under the sink. Vinegar and patience handle most cases anyway.
How often should you clean a washing machine inlet filter?
The honest answer depends on what's coming out of the tap, not a fixed number of months. A reasonable default is annual inspection for typical municipal water, moving to every six months, or quarterly, for well water or a documented sediment problem.
Households with noticeably soft water sit at the other end and may be able to stretch checks to every two to three years without trouble. That's a wide range, which is exactly why a calendar-only rule doesn't serve most households well.
Whatever interval fits the water supply, the more reliable trigger is behavioral: check sooner whenever fill times noticeably slow down or an error code appears, rather than waiting for a date on the calendar.
When cleaning isn't the fix: pressure, valves, and prevention
If a freshly cleaned screen doesn't restore normal filling, look upstream. Two things are worth checking: water pressure at the source, and the condition of the inlet valve's solenoid.
Most inlet valves need at least 20 psi to open fully. Typical residential pressure in Canada runs between 40 and 80 psi, so a shortfall at the source can produce symptoms that look identical to a clog, though the exact range varies by region and utility. Fill trouble can also trace back to a faulty water-level pressure switch or a control-board fault; a pressure switch issue typically triggers an error even after water is already in the drum, which helps tell it apart from an inlet problem.
The solenoid is the small electromagnetic coil inside the valve that opens when the control board calls for water. When it starts failing, it often opens only partway rather than fully, which looks a lot like low pressure rather than a worn part. David Krauss, a certified appliance technician quoted by Shymon, notes that partial solenoid failure regularly gets mistaken for a pressure problem in hard-water regions, since the symptoms overlap closely enough that homeowners swap hoses before calling anyone.
Solenoid replacement means opening the rear panel and working with wiring tied into the control circuit, which Shymon describes as repair-service work rather than a DIY task, with a technician typically able to swap the part in under an hour.
For anyone tired of repeating this maintenance every few months, an inline sediment filter on the cold supply line is a low-cost option. Shymon puts the cost around $10 to $20, and it catches debris before it reaches the internal screen, with a simpler six-to-twelve-month swap schedule than the machine's built-in mesh.
Households with a documented hard-water problem have a bigger option available: a whole-home water softener treats the mineral-scale issue at its source rather than managing it appliance by appliance, and it also benefits the dishwasher, water heater, and anything else sharing the same supply line.
Before you close the panel back up
Run through this before plugging the washer back in:
Screen cleaned and seated straight, not wedged in at an angle
Hose washers checked for cracks or flattening
Water restored slowly, connections checked for drips
Short test cycle run to confirm the machine fills normally
Washing machine inlet filter cleaning is one of the few maintenance jobs a homeowner can handle without special tools or repair experience. If the fill time is still off after all of that, the issue lives upstream: check pressure at the source, or have someone look at the valve, before assuming the washer itself is done for.















Comments
Be the first, drop a comment!