



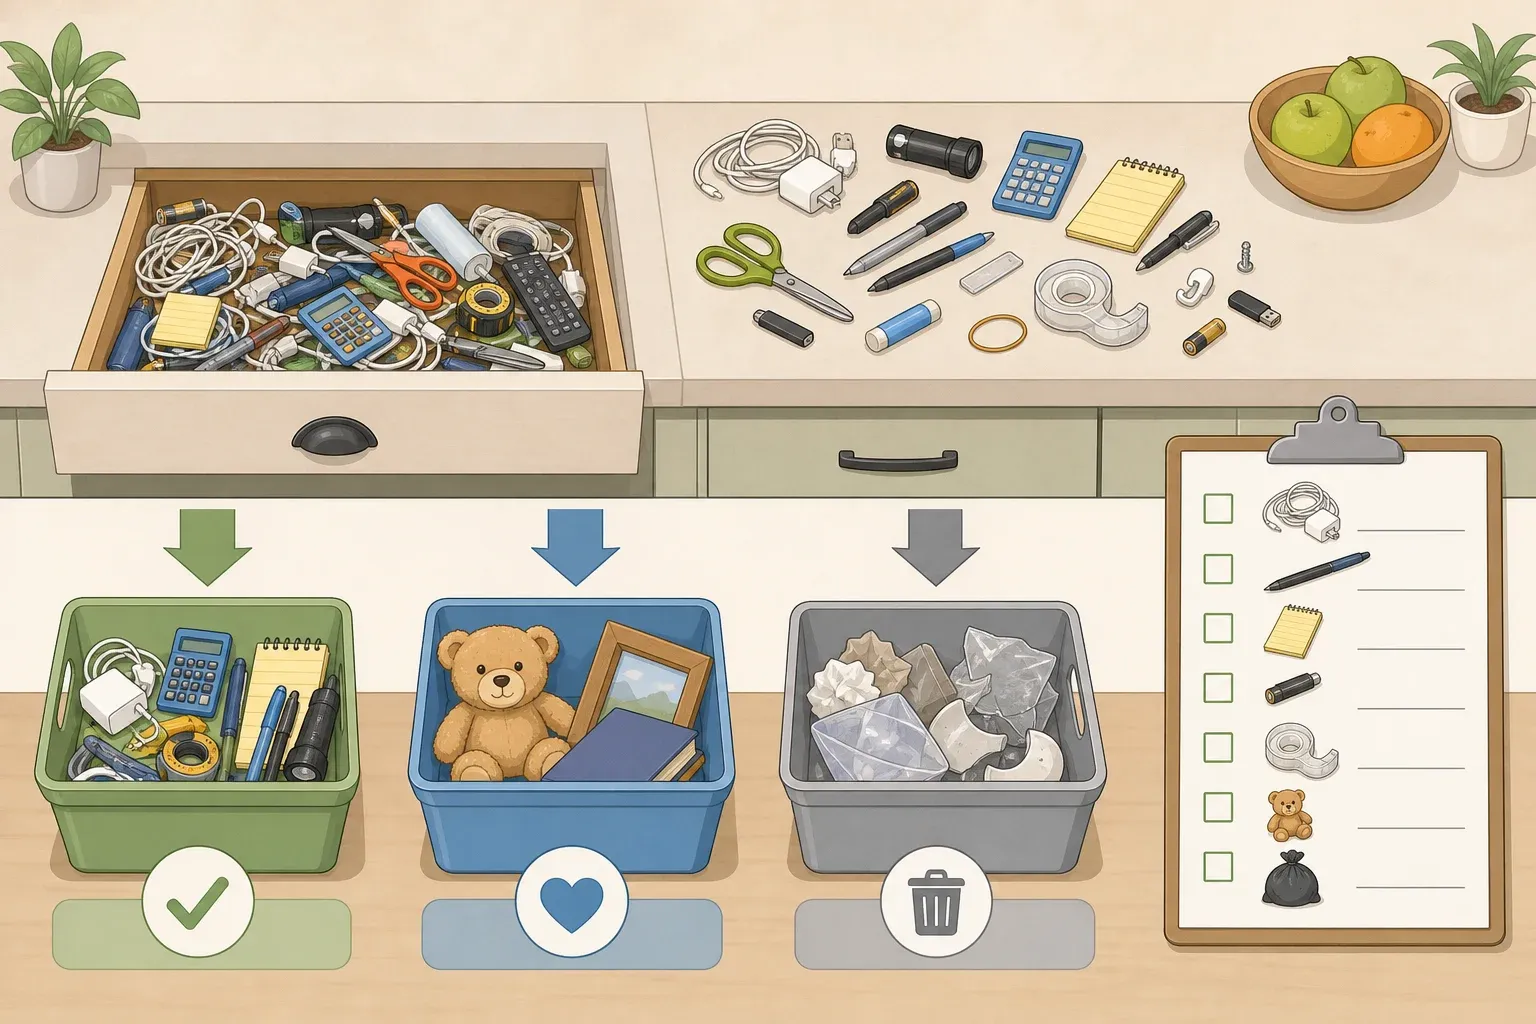
Most kitchen clutter isn't random. It collects in the same handful of spots: countertops, the junk drawer, mismatched mugs, a fridge full of containers nobody can identify anymore. Learning how to declutter your kitchen doesn't mean gutting every cabinet in one exhausting weekend. It works better broken into short sessions: pick one zone, set a timer, sort into keep, donate, and trash bins, then work through the checklist below.
A clutter-free kitchen is worth the effort because it's one of the busiest rooms in the house. Organizing specialist Melanie Summers, owner of I Speak Organized, says clear systems make the space "more functional and less stressful for everyone." Apartment Therapy's decluttering method backs the same zone-by-zone approach, recommending readers pick one spot they can finish in a single sitting, anywhere from 15 minutes to an hour, rather than tackling the whole room at once. It's a project that can be paused and picked back up zone by zone, using tools already sitting around the house. The one place that needs more judgment than a straight toss is food. A date stamped on a package doesn't automatically mean something's spoiled, and that gets its own section below.
What you'll need before you start
Gather everything up front so a mid-project trash-bag run doesn't stall the whole thing.
A timer, set anywhere from 15 to 60 minutes depending on the zone
Three containers or bags labeled Keep, Donate, and Trash, plus a Recycle bag if the local program takes glass or kitchenware
A temporary "maybe" basket for anything not ready for a final decision, with a short deadline to revisit it
Every zone below follows the same basic sequence: clear the space completely, sort what comes out into the bins, wipe down the empty shelf or drawer, then return only what earns a spot. The notes under each zone cover what's different about that spot, not that repeated process.
This is beginner-friendly work. There's no wiring, plumbing, or appliance disassembly involved. Two moments do call for extra care: handling broken dishware, which can have sharp edges, and sorting expired cleaning products, which should stay out of reach of kids and pets and never get combined with each other while sorting.
Run any questionable item through the same quick test as you go: Would you buy it again if you didn't already own it? Would you remember owning it if you weren't holding it right now? Does it do the same job as something else already in the kitchen? And do you actually know where it lives? A "no" on any of these is a reason to pause and consider whether the item deserves its space.
Numbers aren't the point here. A household that cooks most nights or hosts often can reasonably keep more baking sheets, serving platters, or wine openers than someone who eats out most of the week. The goal is intention, not matching some universal count.
Kitchen decluttering checklist: 20 things to get rid of first
These are the most common things to get rid of in a kitchen, grouped by zone. Work through in order, or jump straight to whatever's bothering you most.
Counters
Small appliances unused in the last six months. Move them to a lower cabinet, or donate them if six months of dust says they're not earning counter space.
Decorative items crowding prep space. Keep it only if it helps with cooking or serving; otherwise it doesn't belong where a cutting board should go.
Duplicate items already living nearby, like a second napkin holder or spare fruit bowl. Keep the one in use, and store or donate the rest.
Once the counter is wiped down, only daily-use items should go back.
Declutter kitchen cabinets and drawers without creating a bigger mess
This zone is the trickiest, since dumping everything onto the counter can feel like it's making the mess worse before it gets better. Organizing expert Sarit Weiss recommends resisting the urge to sort item by item: empty the drawer or cabinet completely first, group like items together so the full inventory is visible, then pull duplicates and anything broken.
Chipped or cracked mugs, plates, and bowls. Pull these from food use right away; cracks are hard to clean fully. Most curbside programs don't take ceramics or glassware, so check local recycling rules before assuming they qualify. Otherwise, it's trash.
Duplicate or damaged cookware, including scratched nonstick pans. Donate the extra Dutch oven if one already does the job, and set aside scratched nonstick pans for the trash.
Bakeware, pots, or cutting boards that sit untouched. If a full year has passed without one leaving the cabinet, donate it.
Mystery gadgets and novelty tools nobody remembers how to use. Drop these in the maybe basket. If nobody figures out what it's for by the deadline, it goes.
More than two bottle or wine openers. Keep two, donate the rest.
Tools or utensils untouched in the past year.
Group what's left by type before it goes back into the wiped-down space. That's what keeps a cabinet from refilling with the same clutter in a slightly different order.
Drinkware and takeout leftovers
Extra reusable water bottles beyond what's actually in weekly rotation. Weiss recommends narrowing the collection to favorites and donating the rest.
Souvenir mugs and shot glasses that aren't getting used. If they're sentimental, box them separately and label the box instead of forcing a toss decision.
Plastic takeout cups kept "just in case" but never actually reused.
Takeout condiment packets, plastic cutlery, and stray restaurant menus.
Set aside one shelf for the drinkware actually used, and keep the sentimental box separate so it doesn't drift back into daily rotation.
Pantry, fridge, and freezer
The pantry and refrigerator need one extra check before anything leaves this zone. Not every date-stamped item is actually bad, and the section below explains how to tell the difference before food ends up in the trash.
Expired spices. If the aroma has faded, replace or repurpose the spice rather than keep it out of habit.
Mystery leftovers and anything freezer-burned.
Canned goods or pantry items tried once and never eaten again. If they're unopened and not expired, they're often donation candidates rather than trash.
Duplicate half-used condiments or oils open in more than one spot. Consolidate into one container.
Under the sink and paper clutter
Expired or nearly empty cleaning supplies and worn-out sponges. Home organizing expert Tina Priestly recommends checking the label for disposal instructions before tossing anything, since some cleaners need to go out with hazardous waste rather than the regular trash. Never combine leftover cleaning products while sorting; mixing certain chemicals can release dangerous fumes.
Excess plastic or paper bags and stained storage containers that keep getting saved "for later."
Expired coupons, old event invitations, and expired medication. Check the medication label first. If it doesn't give disposal instructions, use a pharmacy take-back program or the FDA's disposal guidance rather than the trash or the drain.
Before you toss food: Reading date labels the right way
This step can keep usable food out of the trash. Confusion over date labels drives an estimated 20% of consumer food waste.
The labels aren't as uniform as they look. "Best if used by" and "use by" dates mark peak quality, not safety. "Sell by" dates exist to help retailers manage how long a product sits on the shelf, not to tell shoppers when to stop eating it. "Freeze by" indicates when freezing preserves the best quality, not a safety cutoff. Most packaged-food date labels aren't federally required safety indicators; infant formula is the exception.
The one thing that overrides all of that: don't eat anything showing noticeable spoilage, no matter what the package says. When in doubt, throw it out.
As general refrigerator storage guidance, not a rule for every food or handling situation, FoodSafety.gov's cold storage chart points to cooked leftovers holding for 3 to 4 days and raw meat for 1 to 5 days. Anything kept continuously at 0°F or below in the freezer stays safe indefinitely, though quality drops the longer it sits.
Going forward, use FIFO, first in, first out: move older items to the front of the shelf so they get used before anything new gets opened. Unopened, unexpired pantry items that won't get eaten can often be donated instead of trashed. Check the receiving organization's rules first, since not every food bank accepts every type of item.
How to organize a cluttered kitchen so it stays that way
A single purge doesn't stick without a few habits behind it. Summers recommends resetting the kitchen every night: wipe counters, run or load the dishwasher, and put things back where they belong before bed. Store items by how often they're used. Daily items go at eye level, coffee filters live near the coffee maker, and seasonal gear like a turkey roaster moves to a higher or harder-to-reach cabinet.
Apply one in, one out: when a new pan, mug, or gadget comes into the kitchen, an old one leaves. Labels, drawer dividers, and clear bins aren't required, but Weiss notes they make it easier for everyone in the household to put things back in the same spot, which cuts down on clutter creeping back over time.
Finish line: what success looks like
The kitchen is done, for this session, when counters hold only what gets used daily, drawers open and close without jamming, and every cabinet's contents can be named without digging around. Before calling it finished, take donation bags out to the car or a drop-off bin the same day. Anything headed to recycling should go straight into that bin, not a corner marked "sort later."
If the fridge or pantry got cleared out, label whatever goes back in with the date it was made or opened. It's a small habit that makes the next check faster than this one. Pick whichever zone is bothering you most for the next session, whether that's tomorrow or next weekend; there's no requirement to finish the whole kitchen in one day. Choose a zone small enough to finish in one timed session, and whatever gets skipped this round will still be there when it's time to come back to it.













Comments
Be the first, drop a comment!