



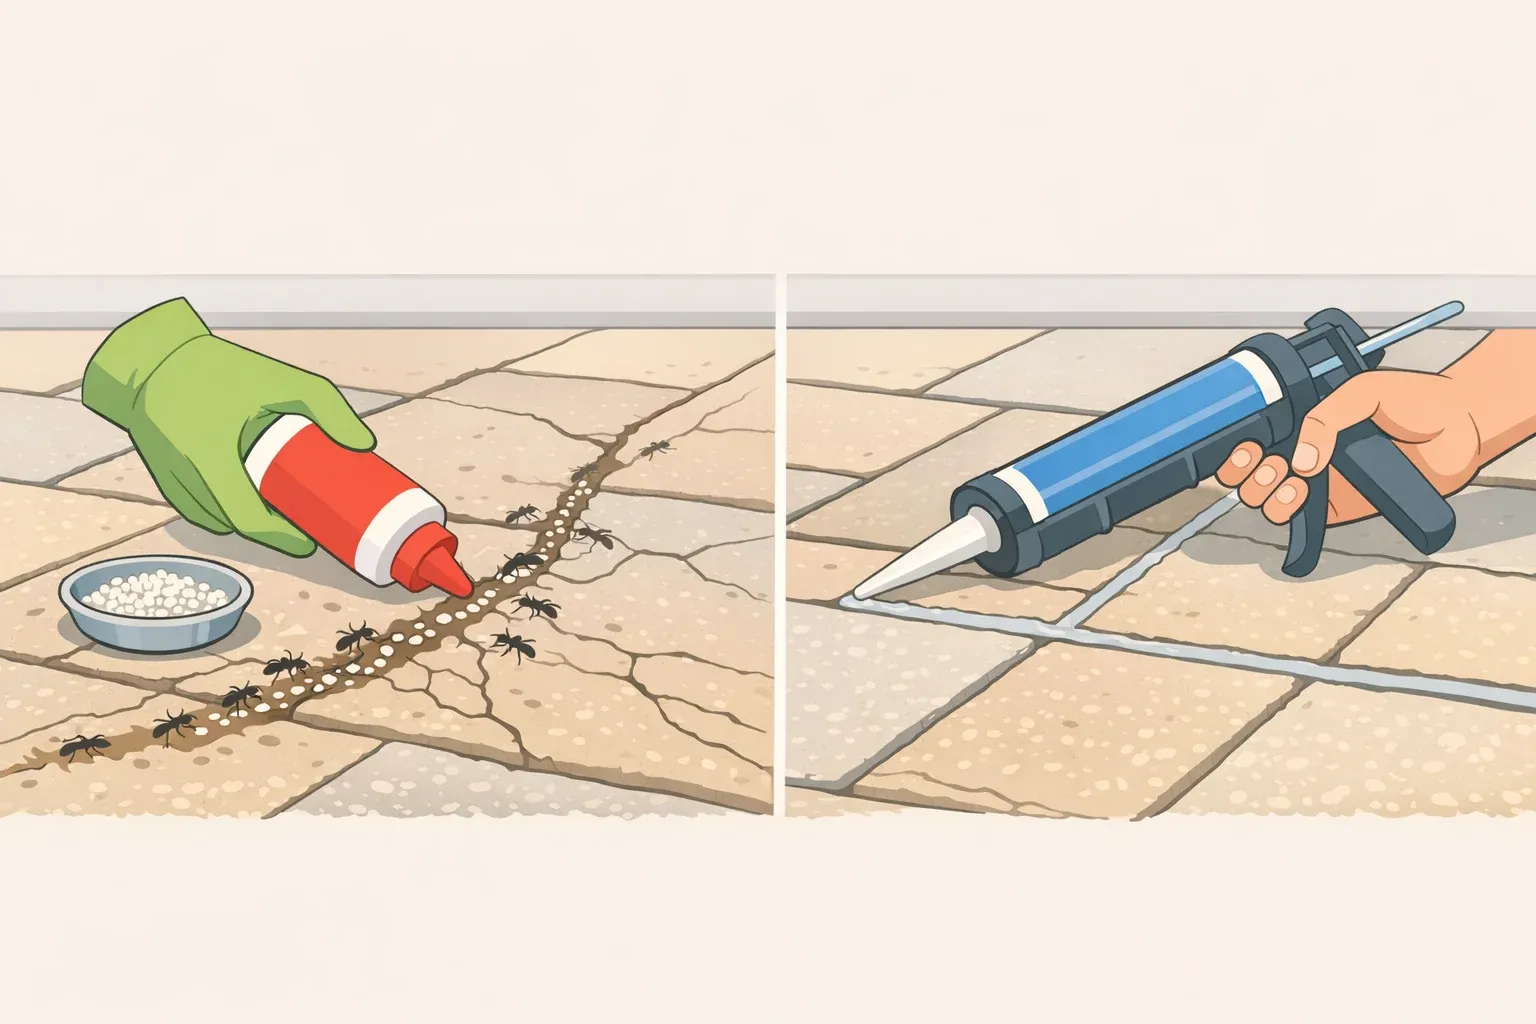
The volcano-shaped mounds of fine soil pushing up between patio stones aren't random. Pavement ants get their name from nesting in soil along the edges and in cracks around pavement, patios, driveways, sidewalks, and foundations.
In significant infestations, colonies can excavate enough soil from below walkways and shallow foundations to occasionally cause structural damage. Knowing how to keep ants from nesting between pavers starts with understanding why the joints are so attractive to them in the first place.
This guide walks through both prevention and active management in a sequence that matters. Make the joints harder to occupy and the surrounding area less hospitable first, then use outdoor bait as a targeted backup if ants are already established.
That sequence, not any single product, is what extension-based integrated pest management (IPM) consistently recommends. Removing access, food sources, moisture, and nesting sites before reaching for any insecticide produces better long-term outcomes than product-first approaches.
One expectation to set upfront: total outdoor ant elimination is neither realistic nor practical. The goal is suppression and exclusion, making your paver zone a place ants choose to leave, and making it harder for new colonies to establish.
Two common culprits show up in most paver problems. Pavement ants are most prevalent in urban areas of the Northeast, Midwest, and Pacific Northwest. Odorous house ants occur throughout the United States and are harder to manage: they have multiple queens, form new colonies by splitting off subcolonies (budding), and are non-hostile to members of related subcolonies, meaning poorly chosen treatments can scatter the problem rather than solve it. The four steps below apply IPM principles to both; outcomes vary by species and local conditions.
Step 1: Diagnose before you act
Everything downstream depends on knowing where the colony is and what's sustaining it. Skip this step, and you're guessing.
1. Pull back mulch and soil along patio edges, then trace any visible ant trails. Look for lines of workers moving in both directions. These foraging trails connect the nest to food sources, such as aphid-covered plants, other food sources, or the structure itself. Pavement ant foraging trails have been recorded at distances of over 30 feet from the nest. Odorous house ant trails typically range between 33 and 157 feet. The colony may be far from the pavers even when workers are foraging between the stones.
2. Identify likely nest locations. Soil mounding between joints or at patio edges points to nesting within the paver system itself. Trails running toward mulch beds, tree bases, or aphid-infested plants typically indicate the nest is nearby but not under the patio.
3. Observe without disturbing. Note any nest entrance you find, then move on. Odorous house ants relocate a disturbed nest quickly, which scatters the problem rather than concentrating it, according to USU Extension.
Confirm you're dealing with ants before proceeding. Ants have tiny waists, hind wings smaller than front wings, and elbowed antennae; termites have broad waists, equally sized wings, and straight antennae, per UC Marin Master Gardeners. The management approaches are entirely different.
Mounds between joints with short or no visible trails: Make habitat fixes (Step 2), then seal the joints (Step 3).
Long trails toward garden beds, trees, or aphid-infested plants: Address habitat and food sources first (Step 2).
Trails and mounds return within days of cleaning: Suspect odorous house ants and expect repeated follow-up, regardless of the method used.
Activity continues after habitat fixes and sealing: Proceed to outdoor baiting (Step 4).
When you finish this step, you should have a working hypothesis: either the nest is within the paver system, or trails point toward a source nearby. That distinction determines which step to prioritize first.
Step 2: Prevent ants between pavers by fixing the habitat first
Before refilling a single joint, fix the conditions that made the patio attractive in the first place. Joint sealing applied over active attractants tends not to hold. The habitat work is what makes everything downstream last.
Moisture first. Fix irrigation lines that spray onto patio edges or foundation zones, and address low spots where water pools after rain. USU Extension lists sprinkler overspray, broken drip lines, leaking gutters, and pooling near foundations among the key moisture conditions that support ant nesting around hardscape. Eliminating standing water near structures is standard across extension IPM programs. Give changes time before concluding they made no difference — moisture conditions at patio edges don't shift overnight.
Mulch and cover. Pull plants and mulch back at least one foot from patio edges and foundation lines. Replace wood or organic mulch adjacent to the patio with pea gravel, not large decorative stones. Both USU pavement ant and odorous house ant guides recommend this swap: wood mulch retains moisture and provides loose, covered soil that functions as ideal nesting habitat, while large stones create gaps that work the same way. Trim overhanging vegetation away from the patio surface as well; shaded, moist zones adjacent to paver joints are exactly the microclimate most ant species seek.
Worth noting: if you recently refreshed mulch beds against the patio edge, that timing may be relevant. Wood mulch close to pavers is warm, moist, and loosely structured conditions that USU Extension identifies as favorable for odorous house ant nesting. Whether it triggered a sudden uptick is impossible to say without observation, but it's a reasonable place to look.
Food sources. Inspect plants near the patio for aphid or soft-scale infestations. Ants actively farm these insects for honeydew secretions; if foraging trails run from the patio toward a shrub or tree, that relationship is probably driving the traffic.
UC Marin Master Gardeners identify aphid-infested plants and fruit trees near the house as a direct driver of ant pressure. Treating the aphids removes the food supply. Keep food, pet food, and outdoor trash fully contained. Scout ants mark food discoveries with pheromone trails that draw the rest of the colony; remove the food, and you remove the signal.
After habitat changes, ant trail activity and fresh mounding should noticeably decline over the following weeks. If trails continue and mounds reappear, the colony is established enough to warrant joint sealing in Step 3 and potentially baiting in Step 4.
Step 3: Seal the joints to stop ants from burrowing under pavers
Once surrounding conditions are less hospitable, eliminate the gaps themselves. This is the most paver-specific intervention in the sequence, but it works best as reinforcement for Step 2, not a substitute for it.
Loose joint sand is easy for ants to excavate and holds moisture; it also erodes over time, creating progressively larger voids. Refilling with standard sand is a short-term fix. Polymeric sand contains a polymer binder that cures into a semi-rigid bond when wetted, closing paver gaps more durably and leaving little accessible soil for ants to enter or burrow through.
That physical exclusion logic aligns with the broader IPM principle of eliminating nesting sites and blocking structural access that extension programs recommend across ant species. When properly installed, polymeric sand can last around five to ten years.
The specific anti-ant performance data here comes from a non-extension source. Treat it as a well-reasoned physical barrier consistent with exclusion principles, not a manufacturer-tested guarantee.
How to apply:
Clear old joint material completely. Sweep or vacuum out existing sand, debris, and any nest material from every joint. Incomplete clearing is the most reliable way to ensure re-application fails quickly.
Fill joints fully with polymeric sand. Work it in with a stiff broom and tamp to eliminate air pockets. The surface should be continuous and flush — any gap or low spot gives ants a foothold before the material cures.
Mist lightly with water to activate the binder. Enough to dampen without saturating. Oversaturation washes the binder out before it sets.
Allow full cure before foot traffic. Follow product instructions; don't shorten this step.
Where it fails:
Incomplete fill leaves small voids that ants can occupy before the surrounding material hardens
Slab settlement or base heaving can crack cured sand, creating new entry points
Pressure washing dislodges the material and destabilizes pavers; use a gentle hose rinse or broom for routine cleaning
Inspect joints each spring before activity peaks. Pavement ant problems are worst in spring and early summer. Getting ahead of that window matters. Patch eroded or cracked sections promptly. Small repairs prevent full re-application.
Properly installed polymeric sand closes surface and shallow-joint nesting sites. It will not resolve colonies already established deep in the base material or under the slab. Those situations require escalation in Step 4.
How to get rid of ants in pavers when prevention isn't enough
If habitat modification and joint sealing haven't reduced activity after three to four weeks, targeted outdoor baiting is the appropriate next step. This is also where choosing the wrong tool makes things measurably worse.
Why spray is the wrong tool. Contact sprays kill surface foragers but don't reach the queen or colony brood. Repellent products are particularly counterproductive against odorous house ants: because the species reproduces by budding, repellent sprays cause the colony to fragment and spread rather than collapse. Baits are the only type of insecticide recommended in most situations and are the safest and easiest to use.
How to bait effectively:
Place liquid bait stations on active trails and near nest entrances between paver joints, along patio edges, and at points where trails disappear into mulch or soil. Placement along active foraging trails determines whether the program works or fails. Sweet, liquid borax-based baits work well for both pavement ants and odorous house ants when positioned outdoors near the source.
Don't also spray. Disrupting foraging trails causes ants to abandon the bait before it reaches the colony.
Replenish bait continuously until feeding completely stops. Baiting programs commonly fail because insufficient bait is supplied. The colony never receives a lethal dose before foragers find an alternative food source.
Keep all stations outdoors, near the nest. Using indoor bait for an outdoor nesting problem can draw additional foragers inside.
For an exposed nest you've located: rake back the mulch, then apply a water-based residual insecticide directly to the nest. This can eliminate individual colonies. It's a limited, targeted option, not a substitute for habitat work and sealing, and new colonies can reoccupy the same territory once the insecticide dissipates.
Sweet liquid bait can eliminate pavement ant activity in a given area within about five days, with effects that may last through the following spring. Odorous house ants are more persistent. Continued follow-up inspections and applications may be needed to keep populations at tolerable levels.
When to call a professional. If activity returns quickly after baiting, if mounding appears at patio edges connected to foundation walls, or if nests appear to be under the slab, the problem has moved beyond DIY range. Nests under slabs or inside foundations may require termite-style applications of nonrepellent insecticides by a licensed pest management professional. Persistent odorous house ant problems especially tend to need professional follow-up; eliminating one subcolony simply opens territory for another.
What actually keeps ants out long-term
Ants between pavers are an environmental problem before they're a product problem. Seal the joints without addressing moisture and cover, and you're patching a symptom. Work through the sequence: diagnose, modify the habitat, harden the joints, bait if necessary, and you're addressing the actual conditions that made your patio worth settling in.
Three things signal DIY has run its course: activity that returns quickly after baiting, mounding at patio edges tied to foundation walls, and any sign of nesting under the slab. At that point, the intervention requires access and materials outside the homeowner toolkit.
Ant pressure resets each spring. The most efficient window is early spring, before scout ants have found and pheromone-marked new nesting sites. Inspect joints, patch eroded sections, and pull mulch back from patio edges before the season starts. The patio that's unattractive to ants in March is usually the one you aren't fighting over in July.

















Comments
Be the first, drop a comment!