



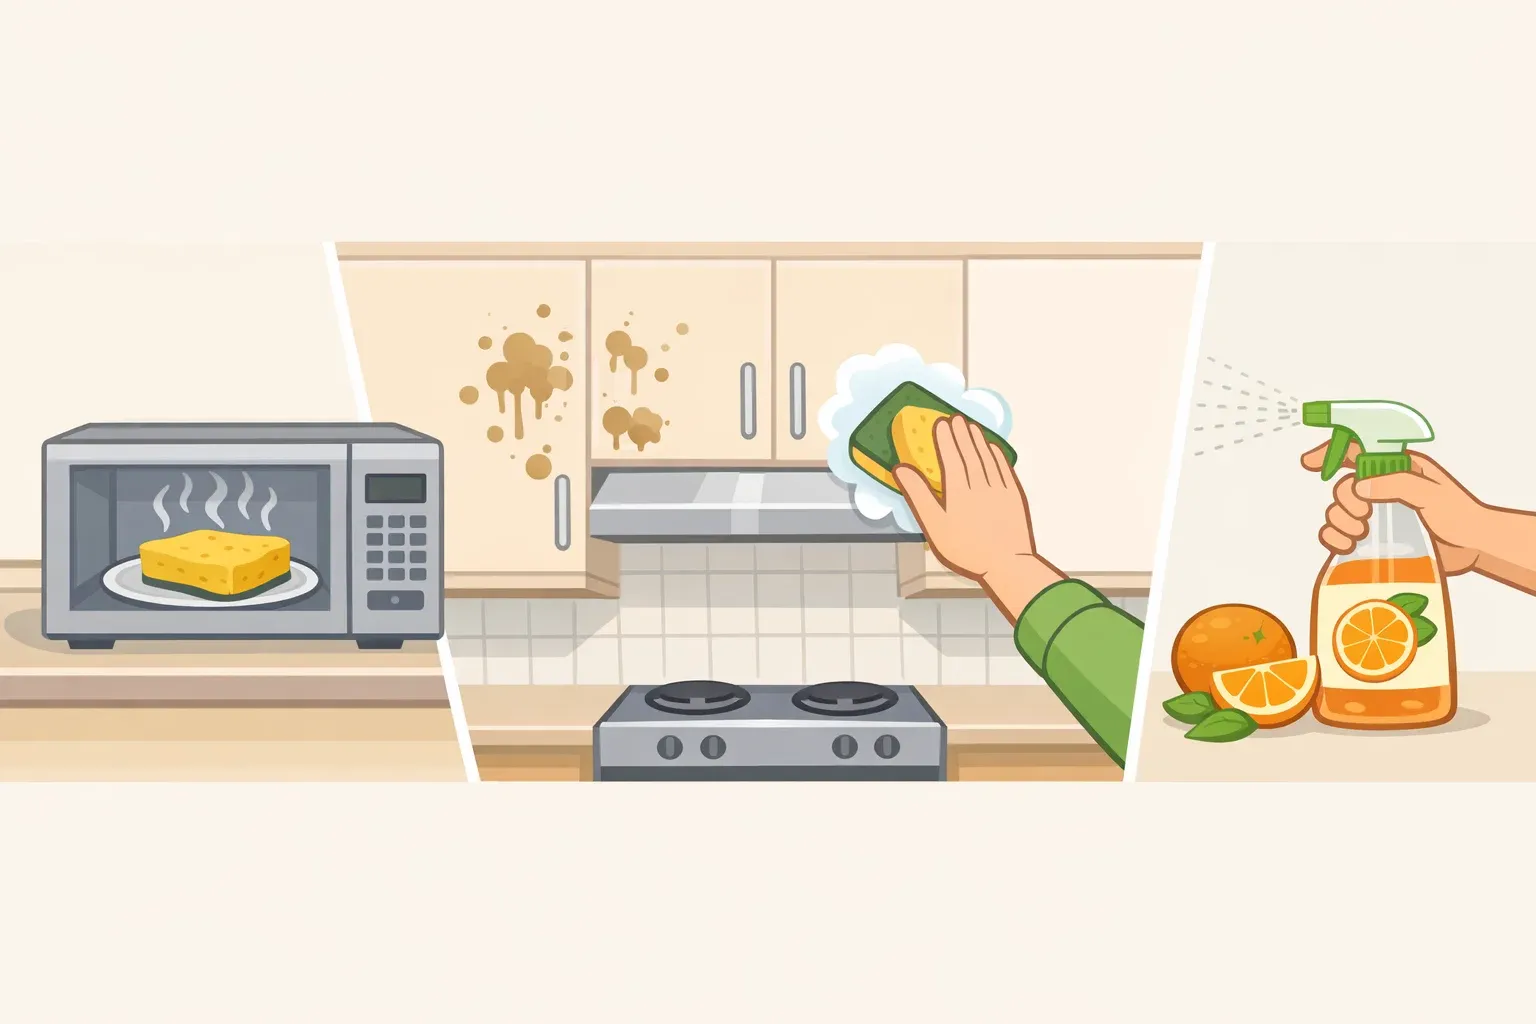
Cabinet grease doesn't respond the way countertop spills do. Knowing how to remove grease from kitchen cabinets properly means understanding that the film above and beside the stove requires heat and the right cleaner to shift, not just a damp cloth. This guide covers one specific, low-cost method for non-wood surfaces: moisten a sponge, microwave it until hot, spray with a citrus-based cleaner, wipe, and dry.
One thing to settle before starting: this method uses heat and moisture. It's for non-wood surfaces. Wood cabinets require a different approach, covered briefly at the end. If the cabinet material is uncertain, treat it as wood until a test spot confirms otherwise.
The method comes from fire prevention guidance published by the Santa Rita Fire District. Grease, oils, and fats act as fuel in the fire triangle, and keeping cabinet surfaces clear of that buildup directly reduces the combustible material nearest to the stove. There's a safety return here that goes beyond appearances.
What follows: materials, a surface check, the six-step sequence, when to stop, and brief notes on wood.
What you need
One plain cellulose or foam sponge (no metallic scrubbing pads; these cannot go in a microwave)
Dishwashing or heat-resistant gloves
A citrus-based cleaner, orange or lemon formula
Paper towels or a dry microfiber cloth
On citrus cleaners: the research suggests plant-derived degreasers can be more effective than their gentle reputation implies. A 2024 study comparing a non-toxic, plant-derived biodetergent against a standard commercial degreaser found the biodetergent removed 100% of oil from smooth and metallic surfaces versus 90% for the commercial product, and achieved full destabilization of the oil in two minutes against the commercial product's partial result at four minutes. Those tests used industrial surfaces and petroleum-based oils rather than kitchen cabinet grease, so the comparison isn't direct. The performance gap is large enough, though, to make a citrus formula a confident choice rather than just a cautious one.
Is this method right for your cabinets?
This method is suited to smooth, sealed, non-wood surfaces in good condition. Before starting, apply a small amount of the citrus cleaner to a hidden spot as a precaution. If the surface shows any change, stop and use the wood approach instead. If it looks unchanged, proceed.
Stop before starting if the surface is any type of wood, if the finish is visibly peeling or compromised, or if the cabinet coating is unfamiliar.
A few mistakes are worth knowing before picking up the sponge:
Using a sponge with a metallic scrubbing layer, it will arc in the microwave
Applying cleaner so heavily that liquid pools at seams or hardware
Pressing harder when grease doesn't lift on the first pass; dwell time and heat do that work, not force
Leaving citrus cleaner on an untested surface for longer than a minute or two
How to clean greasy cabinets: the hot sponge method
Step 1: Wet the sponge
Saturate a plain cellulose or foam sponge with water. It should be wet through.
Step 2: Microwave it for about 30 seconds
Heat the wet sponge in the microwave for approximately 30 seconds. It will be very hot when it comes out.
Only plain cellulose or foam sponges are microwave-safe. A metallic scrubbing layer will arc.
Step 3: Glove up before touching it
Put on dishwashing or heat-resistant gloves while the sponge is still in the microwave. The sponge requires gloves before handling.
Step 4: Spray the cabinet with citrus cleaner
Apply an orange or lemon citrus-based cleaner to the greasy section. Keep the application light rather than saturating the surface.
Step 5: Wipe with the hot sponge
Use the hot sponge to remove the grease. The sponge loses heat as you work, so on larger cabinet faces, returning to Step 2 between sections keeps the method effective.
Step 6: Follow with a paper towel
Use a paper towel to pick up any remaining grease the sponge didn't fully lift.
The surface should feel smooth and dry when you run a finger across it. If it's still slightly tacky after drying, re-spray, wait a moment, and repeat Steps 5 and 6. More pressure isn't the fix.
When to stop and switch methods
This method is suited to flat, sealed, undamaged non-wood surfaces. A few situations call for a different approach.
The finish is already damaged. Peeling or compromised surfaces can worsen with heat and moisture. A barely damp cloth is the safer option until the finish issue is resolved.
The surface type is unclear. As a precaution, treat any unfamiliar coating as you would wood: test first, and err toward caution if the result is ambiguous.
Grease has worked into raised grooves or decorative details. A flat sponge won't reach those areas. A soft toothbrush with a small amount of cleaner gives better access; dry thoroughly afterward.
There's an active heat source nearby. Spray cleaners and open flames don't belong in the same space. Clean only when the stove is off and surfaces are cold.
Keeping it from building up
Staying ahead of cabinet grease is simpler than breaking down a thick layer that's had time to set. Wiping surfaces above and beside the stove after cooking sessions that involve frying or sautéing takes far less effort than running the full method on heavy buildup.
For heavier residue, run the full hot-sponge method when a dry fingertip across the surface catches or feels tacky.
The fire-safety case for making this a routine is concrete. Grease, oils, and fats function as fuel in the fire triangle, and keeping cabinet surfaces clear of that buildup reduces the combustible material sitting closest to the stove. Stovetop wiping alone doesn't cover the cabinet faces that accumulate airborne grease over time.
If your cabinets are wood
Don't use this method on wood. Heat and moisture can warp, discolor, or lift the finish, and that risk applies regardless of whether the wood is sealed.
For wood cabinets, the safest starting point is a cloth with minimal moisture and mild soap, wiped with the grain and dried immediately. Because wood cabinet finishes vary considerably, the manufacturer's care guidance is a more reliable reference than any general instructions here.
Where to go from here
Heat softens what's accumulated; the citrus cleaner breaks it down. Neither is as effective without the other, and together they handle residue a damp cloth won't touch.
The surface check is the one step that requires judgment. If the test spot looks fine, the rest is straightforward. If not, the cautious approach and a plain damp cloth are the right path until the surface condition is clearer.
















Comments
Be the first, drop a comment!