


By the end of this guide, you'll know how to make a bed properly in around ten minutes using a clean, repeatable sequence: smooth the fitted sheet, lock the flat sheet at the foot with hospital corners, center and fold back the duvet, and place the pillows. Done right, the bed should stay neat until you pull it apart that night.
The reason hospital corners work better than simply pulling the covers up is mechanical: the diagonal fold tucks extra fabric under the mattress at each foot corner, reducing the slack that lets sheets migrate sideways overnight.
What you'll need before starting
Fitted sheet
Flat, or top, sheet — see the decision note below if you're a duvet-cover-only household
Duvet, comforter, or blanket with cover
Pillowcases and pillows
Optional: mattress protector
Flat sheet or duvet-cover only? Decide before Step 1. Hospital corners require a flat sheet. A flat sheet also adds a washable barrier between you and the top bedding layer, but if you use a duvet with a removable, washable cover, the flat sheet is optional. If you're skipping it, complete Steps 1 and 2, then jump to Step 6 and lay the duvet directly over the fitted sheet. If you're using a flat sheet, follow every step in order.
Build the base
Order matters here. Layers placed wrong mean undoing previous work. This sequence becomes automatic with practice.
Step 1: Add a mattress protector
Lay the protector over the bare mattress. It guards against spills and wear. The Asthma and Allergy Foundation of America recommends zippered allergen-resistant or plastic covers for pillows, mattresses, and box springs to help control contact with dust mites.
If you use a topper, check its care instructions and fit: some toppers sit above the protector, while others can be covered by a deep-pocket protector that fits over both the topper and mattress.
Step 2: Fit the fitted sheet
Attach the elastic corners diagonally: one corner first, then the one directly opposite, to keep the sheet centered on the mattress. Smooth any bunching toward the edges. The surface should be completely flat before you lay anything over it. Any ridge or lump here will show through every layer above it.
Wrinkle tip: remove sheets promptly while they're still warm, then smooth them directly onto the bed. This helps limit wrinkles without ironing; just follow the care label and avoid over-drying, which can shrink or roughen some fabrics.
Step 3: Lay the flat sheet
Spread it over the fitted sheet with the finished or decorative side facing down; it folds back later to show that side at the headboard. Pull the sheet toward the headboard so there's sufficient overhang at the foot and sides to tuck, with minimal excess at the top.
Before doing anything else, check that both sides hang evenly. Uneven placement here is the most common reason hospital corners end up pulling to one side. This is the key check at this stage: a quick straighten now saves re-tucking later.
Make the hospital corners
This is the step that keeps the flat sheet from loosening first. The Sleep Foundation describes hospital corners as a bed-making method that creates tight, diagonal folds near the foot of the bed, helping sheets stay taut and reducing loose fabric around the mattress.
Step 4: Tuck the foot of the sheet
Stand at the foot of the bed. Pull the hanging fabric taut and tuck the entire bottom edge firmly between the mattress and the bed frame or box spring. Work from the center outward toward each corner. There should be no visible slack when you're done.
Platform bed note: the technique is identical: tuck under the mattress edge directly. If frame clearance is tight, confirm your flat sheet has enough overhang before you start. A sheet that's too short will not hold a corner regardless of how precisely you fold it.
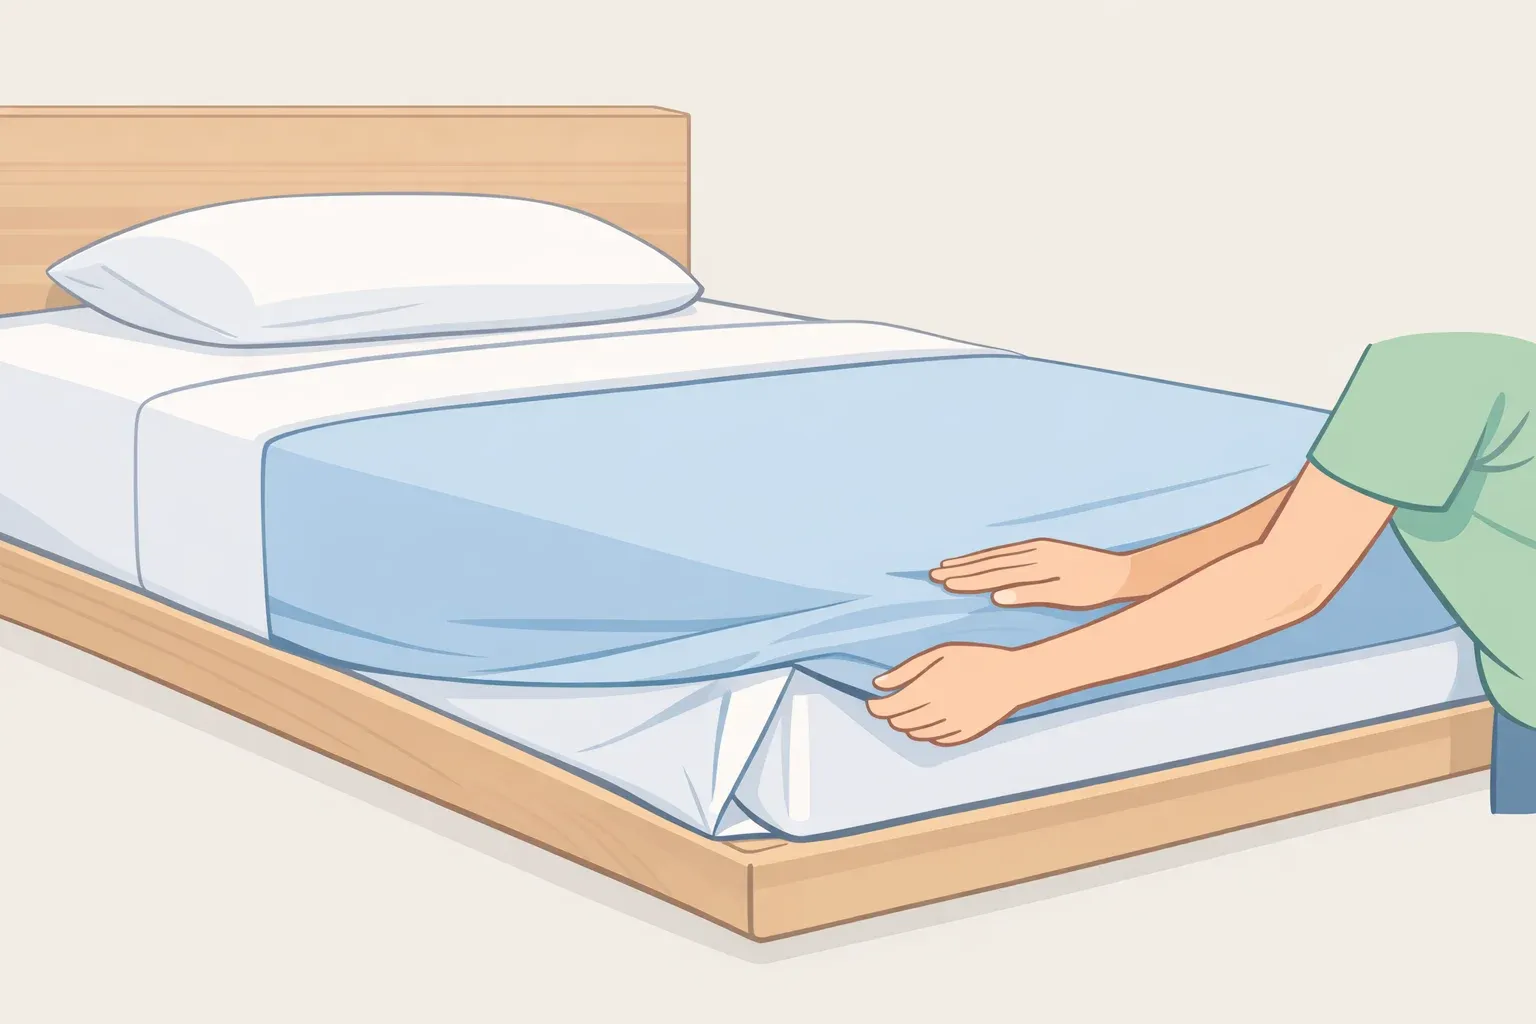
Step 5: Make hospital corners at each foot corner
Think of it as wrapping the corner of a gift box. Work through this sequence on each side:
Standing at one foot corner, pick up the side edge of the sheet and lift it straight up. The fabric should fall across the mattress at a diagonal pointing toward the headboard.
Hold that fold in place with one hand.
With your free hand, take the hanging fabric below the fold and tuck it under the mattress.
Drop the triangle fold down over the side of the mattress and tuck it under firmly, pulling as taut as you can.
Repeat on the other foot corner.
The tension target is firm, not uncomfortable: the sheet should look smooth and resist light pressure, but it should not pin your feet down.
Once both foot corners are done, tuck the long sides straight down without the triangle fold, keeping tension even across the full length of the bed.
Common failure points worth knowing before you hit them:
Too much sheet at the headboard. If the flat sheet is pulled too far up, there won't be enough overhang at the foot to tuck securely. Fix placement before tucking anything.
Loose tension in the final tuck. A corner that's only lightly tucked is more likely to loosen overnight. Pull firmly and tuck deep.
Corner keeps slipping after a few nights. The sheet is likely too short for your mattress depth. Switch to a larger flat sheet or one with more overhang; extra fabric is what gives the tuck enough grip. Deep-pocket mattresses and pillow-tops in particular need more overhang than a standard sheet provides.
Too tight for comfort. A very snug tuck can feel restrictive if you stretch out or move your feet while sleeping. Leave a small amount of give at the tucked sides, or loosen them slightly before getting in.
How to know you've done it right: the flat sheet is centered and pulled toward the headboard. A clean triangle was visible at each foot corner before the final tuck. Both sides are evenly tucked with consistent tension. The surface holds light pressure without shifting.
Add the top layer and pillows
The structural work is finished. From here, the goal is restrained: neat enough to look intentional, simple enough to undo in seconds.
Step 6: Add the duvet or comforter
Center it over the flat sheet with roughly equal overhang on both sides. Then fold the top edge of the flat sheet back over the duvet to reveal the finished side cleanly at the headboard. This creates the hotel-style header fold and keeps the sheet from bunching under the duvet where you can't see it. Straighten so both sides hang evenly to the floor or bed frame.
If you skipped the flat sheet, lay the duvet directly over the fitted sheet, center it, and fold back the top edge of the duvet cover itself to expose the interior fabric. The visual result is similar; the process is the same.
Step 7: Place the pillows
Fluff each pillow, then place sleeping pillows against the headboard with the pillowcase openings facing inward so the bare pillow is not visible. The bed is made.
A note on extras: keep them minimal or skip them entirely. Decorative cushions add time without making the bed more comfortable, and they usually are not washed as often as sleeping pillowcases. One folded throw at the foot gives the room a finished look without adding much daily overhead.
Why the routine gets easier
The point of using the same sequence each time is speed. Once the steps become familiar, you are maintaining a shape instead of rebuilding the bed from tangled sheets.
For hygiene, Good Housekeeping says washing bed sheets once per week is the standard recommendation for most people, though habits and lifestyle can affect the timing. Wash duvet covers, comforters, blankets, and pillows according to their own care schedules. The routine is easier to keep up when making the bed no longer feels like a project.
Final checklist: what a properly made bed looks like
Fitted sheet smooth and flat, with no ridges
Flat sheet centered, hospital corners secured at both foot corners, and sides evenly tucked
Duvet centered, with the flat sheet folded back cleanly at the headboard
Pillows placed against the headboard, with openings facing inward
Optional throw folded at the foot
Ten minutes the first time. Less than that once the sequence is familiar.


Comments
Be the first, drop a comment!