



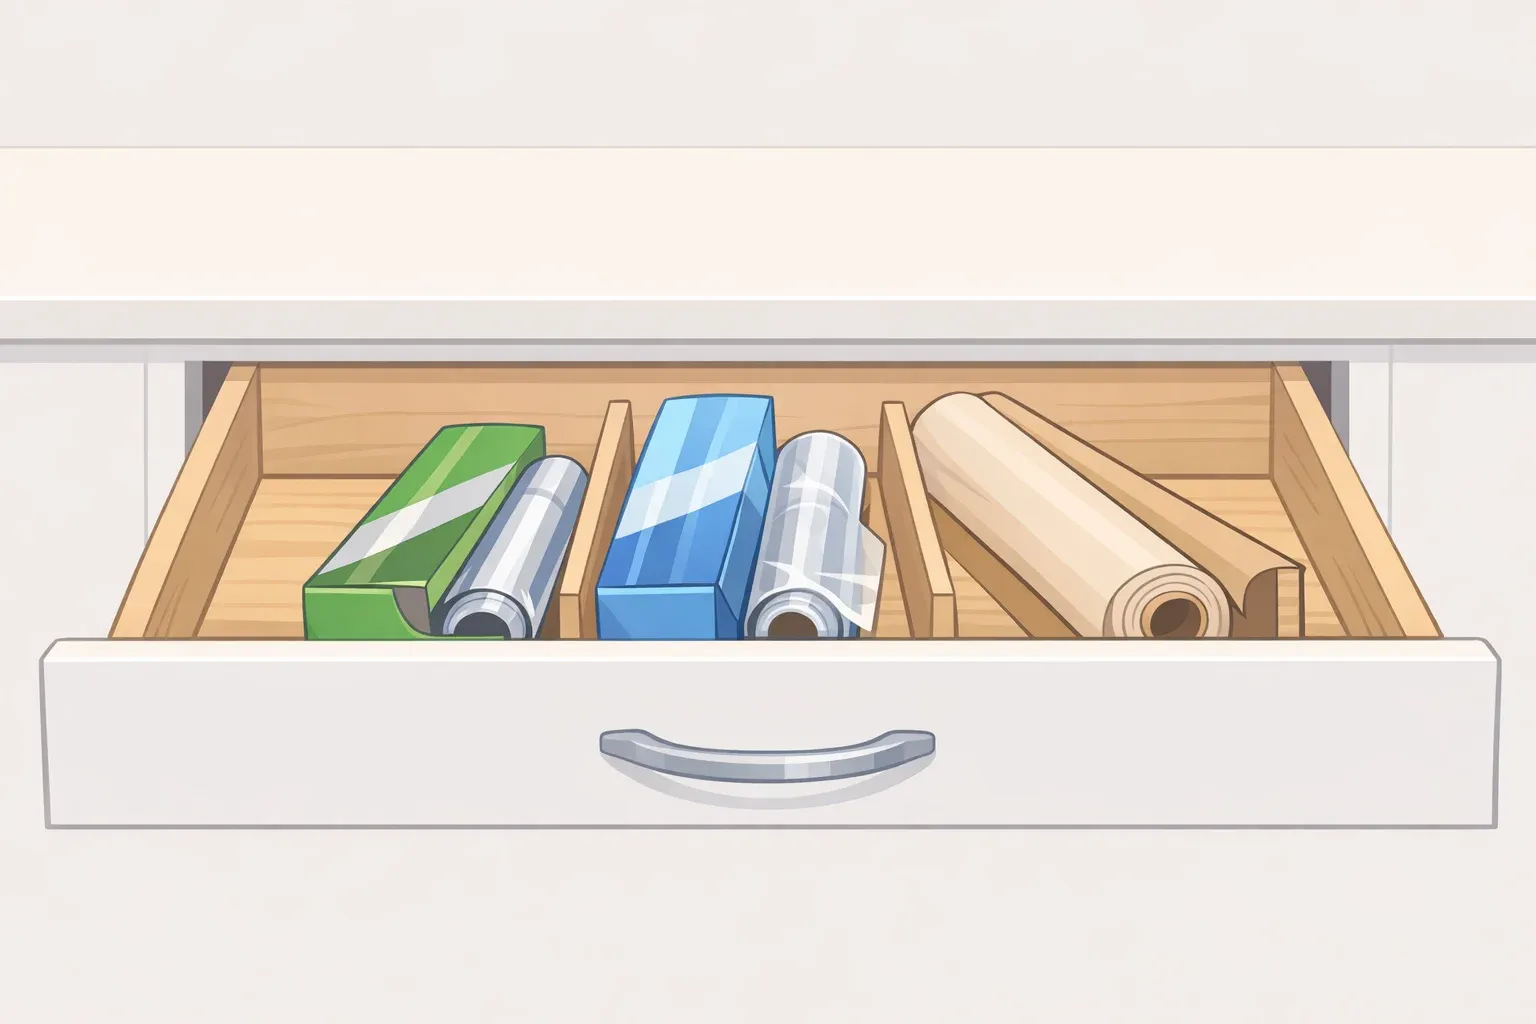
Foil, plastic wrap, and parchment paper are among the most-reached-for items in any kitchen and among the most chaotically stored. Long boxes tip over in cabinets, plastic wrap tangles before it's useful, and the parchment roll ends up at the back of a shelf behind everything else. Knowing how to organize foil and plastic wrap in your kitchen is less about finding the perfect product and more about choosing the right location and system for how you actually cook.
The solution that consistently works is specific, not generic: choose a storage spot near where you prep food, then organize the rolls by how often you use them. In a Martha Stewart interview with kitchen experts Nicole Presley, Catherine McCord, and Sarah Kieffer, Presley described using a dedicated roll-out drawer for plastic wrap, parchment paper, and aluminum foil, arranged by frequency of use.
Before you start: choose your location first
The system you build only works if it's close to where you actually cook. Before settling on a drawer, cabinet, or wall-mounted option, answer two questions: Where do you prep food? And what storage space sits within two or three steps of that spot?
Pull out a measuring tape. Check the interior height and depth of any candidate cabinet or drawer. Foil, plastic wrap, and parchment boxes are longer than most people expect, and a storage solution that doesn't physically fit the box is no solution at all. Also take stock of what you currently store in that space and whether it genuinely needs to stay there.
Clearing one drawer or one cabinet shelf near the prep zone is often easier than it looks, and the payoff in daily convenience is immediate. Avoid hot storage spots, including oven drawers, warming drawers, or cabinets that get warm from nearby appliances. Plastic wrap, wax paper, and some packaging can warp, shrink, or melt when exposed to heat, so the best spot is close to your prep area but still cool and dry.
Best option: a dedicated drawer
If your kitchen has a spare drawer near the stove or prep counter, this is where to start. If you do not have one, the other methods below can still work well.
Presley's drawer is not just dedicated; it's sequenced. Parchment goes where she reaches first because she uses it most, followed by foil and then plastic wrap. Kieffer takes a similar approach, keeping rolls tucked in a drawer and pulling them out as needed. The point is not just dedicated space; it is arranging that space around how you actually cook.
How to set it up:
Empty the drawer completely and wipe it out.
Lay your rolls and boxes flat inside, then arrange them from front to back in order of how often you reach for each one. Most-used item goes in front.
Close the drawer and do a quick test run: open it, grab the front item, use it, return it. If the motion feels natural and nothing shifts, the arrangement works.
If the boxes slide around, line the drawer with a non-slip mat or add a simple divider to keep them separated.
If a spare drawer feels unrealistic, the options below can still keep the rolls visible, contained, and easy to grab
If you don't have a spare drawer
No available drawer doesn't mean no solution. Three alternatives cover the most common kitchen constraints. Choose by your actual limitation, not by what looks good in a photo.
Cabinet storage with a vertical organizer
Cabinet storage works best when the boxes are separated; otherwise, they tip, slide, and get buried. A vertical organizer in bamboo or vinyl-coated wire keeps each box upright and separated, which is the specific fix the format needs.
Measure your cabinet's interior height before ordering anything. Foil and parchment boxes are longer than they look, and upright organizers need enough shelf height to hold them securely.
If your kitchen only keeps two rolls, say plastic wrap and foil, an under-shelf organizer is a smaller-footprint option. It clips to an existing shelf rather than occupying cabinet floor space, and suits compact setups with minimal interior depth.
Best for: Kitchens with cabinet space but no drawer to spare. Vertical organizer for three or more rolls; under-shelf option if you only keep two.
Gotcha: Don't put this cabinet in a corner or a hard-to-reach spot. The whole point is one-motion access during prep. If the cabinet requires two steps and a crouch, you haven't solved the problem.
Wall-mounted system with a cutter
A wall-mounted dispenser with an integrated cutter removes these supplies from cabinets entirely. McCord recommends this option for smaller kitchens where cabinet and drawer space is constrained, or for cooks who want the supplies accessible but out of the way. The integrated cutter also means you're not hunting for the box's serrated edge or fumbling with the cardboard flap mid-recipe.
Before purchasing, confirm the mounting requirements. If you rent or do not want to drill into cabinetry, look for an adhesive-mounted rack, an over-door organizer, or an under-shelf holder instead.
Best for: Small kitchens with limited cabinet depth and available wall space within reach of the prep zone.
Gotcha: Mount it at a comfortable working height, close enough to the prep area that using it doesn't interrupt your flow.
Pantry magazine rack
A repurposed magazine rack lines up foil, plastic wrap, and parchment boxes upright, side by side. McCord also points to a pantry magazine rack as a useful option because it keeps boxes upright, protected, and out of the main work area.
The constraint is proximity. A well-organized pantry rack across the kitchen is still inconvenient mid-recipe. This method works only if the pantry is within a few steps of where you actually cook.
Best for: Kitchens with a nearby pantry and enough space to keep the boxes visible and upright.
Gotcha: Don't let the magazine rack become a catch-all. If it gets crowded, you've just moved the chaos from the cabinet to the pantry.
Choose formats that are easy to use
Storage method matters. So does what you're putting into it. Two format decisions cut down on friction regardless of where you store these supplies.
For frequent bakers: pre-cut parchment sheets
If you bake regularly, pre-cut parchment sheets can be easier to store and use than a roll. Keep a small working stack near your baking pans and store the backup supply elsewhere. This keeps the daily-use area tidy without forcing a bulky supply into a drawer or cabinet.
For plastic wrap: an industrial box with a built-in roller
Standard consumer plastic wrap can tear, crumple, or stick to itself before you get a clean piece. Presley buys industrial-style boxes equipped with an internal roller that feeds the wrap cleanly, specifically because standard wrap so easily gets stuck to itself. Check that the industrial box fits your chosen storage space before ordering. A drawer that works perfectly for standard-size boxes may need a quick re-measurement.
Keep the system stocked
To keep the system working, check stock before you cook, not after you run out.
Add wraps and parchment to your usual pre-cook check, right alongside confirming you have enough of the main ingredient.
Which setup is right for your kitchen
Drawer available near prep area: dedicated drawer, arranged front-to-back by frequency of use
Cabinet space only, three or more rolls: vertical bamboo or wire organizer
Cabinet space only, two rolls: under-shelf organizer
Small kitchen with available wall space: wall-mounted dispenser with integrated cutter
Pantry within a few steps of prep area: magazine rack
The right system is the one that fits your kitchen, sits close to where you cook, and is easy to maintain. Pick that one, set it up once, and the daily friction of digging for a sheet of foil disappears.














Comments
Be the first, drop a comment!